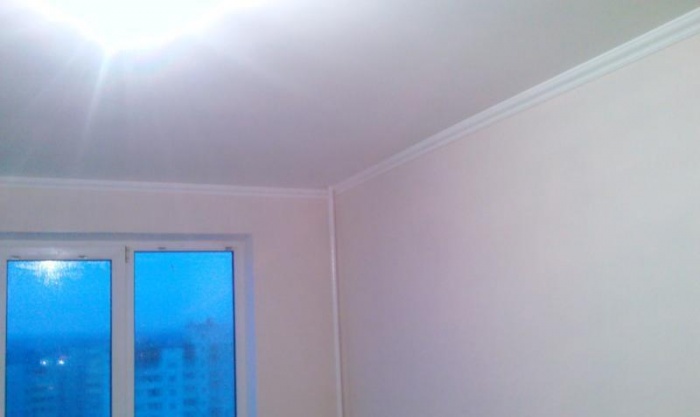
An easy way to level walls. How to level the walls in an apartment? Advantages and disadvantages of gypsum compositions
- Easy redecorating. In this case, the walls are usually changed or repainted. If your old wallpaper did not show any unevenness in the wall, then there is no need to level the walls before gluing new ones. This may just make a hole in your budget. Of course, if you want to do everything properly, then it's up to you.
- The renovation is being done in only one room of the apartment. In this case, during the renovation, residents live in other rooms. That's why a large number of dust is not advisable, as it will end up in things and respiratory tract residents. If you can’t do without leveling, then you should use dust-free methods.
- It is planned to apply large-textured decorative plaster to the wall. One of the advantages of decorative plaster is that it does not require careful preparation of the walls. At least that's what the sellers say. Yes, they are right, since their material fills all the bumps and potholes. But at the same time its consumption increases greatly. And decorative materials cost several times more than ordinary plaster or putty. So the same thing is worth thinking about.
Technologies for finishing walls without leveling.
Textured plaster . When using this method finishing no wall alignment required. itself creates unevenness and at the same time the unevenness of the wall itself is masked. You just have to choose relief plaster. Thin coatings will not be able to hide imperfections in surface preparation.
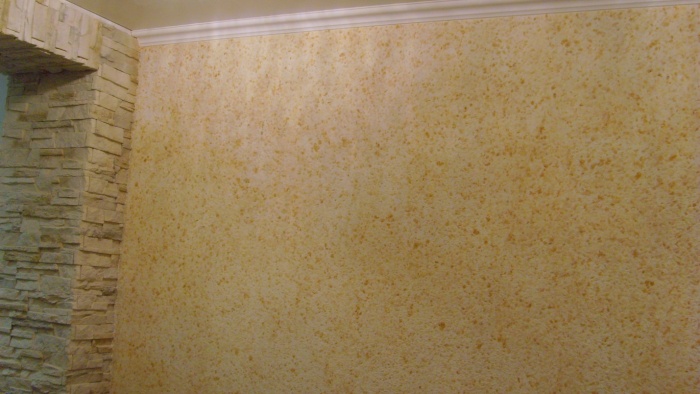
Paintable wallpaper. Thick wallpaper, when pasted, levels the walls, creating an even plane without sinkholes and potholes. This option is suitable if the wall is not badly damaged and not very crooked.
Decorative stone finishing. If there is a decorative stone on the wall, then it is definitely not worth leveling the wall. The only thing worth taking care of is bearing capacity. The wall should not crumble, pieces should not come off or break off. Well, naturally, it should not fall under the weight of stones. Strength should be taken especially seriously if natural stone is used. Its weight is sometimes greater than the weight of the wall itself.
Old finishing, repairs, leveling the walls of the room, premises along the beacons, plastering the walls
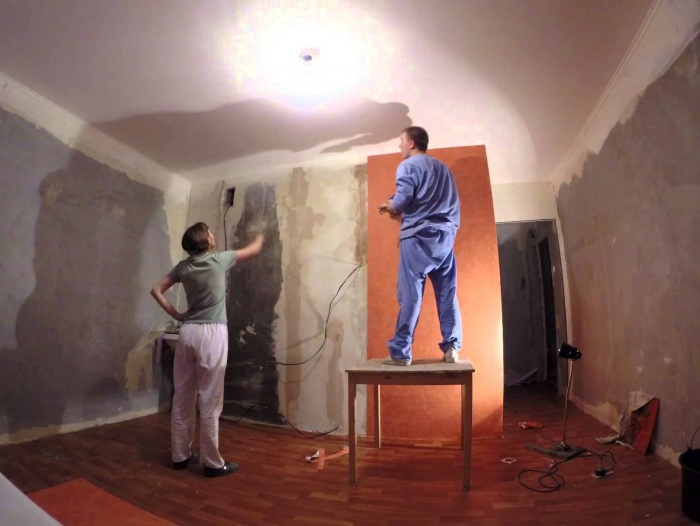
If you are starting a renovation, then, of course, it is advisable to first thoroughly prepare. Preparation often begins with the material base. There are a variety of repairs, from cosmetic, where it is enough to simply re-glue the wallpaper, to major ones, where the premises are redeveloped and repairs are carried out according to the design project, including leveling the walls and leveling the floor. In all price lists of construction organizations, prices for work are indicated “from”, because it all depends on what goals and objectives you set for the craftsmen. A certain upper limit for the cost of one square meter decoration of the room does not exist. The same thing happens with building materials. Variety of floor coverings, wallpapers, household appliances etc. a huge amount, what you will use, what furniture to install, it’s up to you.
So, let's try to figure out what and why? We completely vacate the room where the renovation will take place, nothing should get in the way. After that we start dismantling work, we break down the unnecessary.
Each repair begins with electrics; it is best to stretch the cables under the screed, thereby eliminating gating. Before working as an electrician, it is necessary to determine exactly how many switches, sockets there will be, where and how they will be installed.
So, we get to the question of how to level the walls. You can level the walls using a plaster mixture, or you can line them with different sizes. The German manufacturer has several cladding options, single-layer, double-layer, etc. it all depends on the requirements for sound and thermal insulation. If there are no special requirements, but you need to have smooth walls, then plastering, further puttying under wallpaper or under - the most perfect option.
Leveling the walls along the beacons using a gypsum-based plaster mixture “ROTBAND”
What is alignment of walls according to beacons? First, the surfaces are prepared, old wallpaper is removed, cleared of debris, and a primer is applied. Next, the so-called beacons are placed, T-shaped metal profiles; they serve as guides for evenly drawing out the solution. The correct geometry of the walls depends on how to correctly position the beacons. They are installed using plaster at a distance from each other “h”, where “h” is the length as a rule, preferably no more than 2 meters. Beacons are placed strictly vertically according to the principle of identical relative positions relative to each other. The plaster is applied from the bottom up, after which it is pulled out in a regular, zigzag motion.
The use of plaster mesh is necessary if the thickness exceeds 40-50 mm or there is no certainty of good adhesion. After basic leveling, the surface becomes rough, which promotes good adhesion for subsequent application of putty. Puttying occurs, as a rule, in 2 stages, thereby serving to level out minor differences with subsequent preparation for final finishing. Plaster Rotband recommended as a proven and, most importantly, quality product Russian market.
Leveling walls with plasterboard
There is also a way to level walls using plasterboard sheets.
Applicable for:
- finishing structures made of brick and concrete;
- eliminating uneven floors;
- increasing sound and thermal insulation of enclosing structures;
- increasing fire resistance (in cases where the fire resistance limit and class are standardized fire danger with appropriate fire-technical characteristics).
Cladding with Knauf sheets is carried out using Perlfix mounting.
Or Knauf Fugenfüller putty mixture (used when the surface is flat).
The most important condition is that the height does not exceed the length of the sheet. With the help of numerous portions of the adhesive composition applied to the plasterboard sheet, leveling occurs. The joints between the sheets are puttied. Next comes preparation for painting or wallpaper.
When requirements for sound and thermal insulation are presented, cladding is made from a metal profile. Typically used ceiling profile 28x27 and 60x27. This saves space. After installing the frame according to the level, insulation and sound insulation are performed, for example, mineral wool. Sheathed with plasterboard or gypsum fiber in one or double layer.
Installation of facings should be carried out along with finishing work (in winter with the heating connected), before installing clean floors, in dry and normal wet conditions. In this case, the room temperature should not fall below 10 degrees.
First, you need to mark the design position of the structural elements. To install partitions, it is necessary to mark the location of the rack profiles on the floor. Using a plumb line, the markings are transferred to the enclosing structures and the ceiling.
When the length of the cladding is more than 15 m, expansion joints are required. In addition, they are installed in the expansion joints of buildings.
On PNs that are attached to floors and ceilings, sealing tape is applied before installation.
In accordance with the markings, guides are installed and attached to the ceiling and floor. Adjacent PSs are also secured with dowels. The guide fastening step should be 1 meter.
The racks are installed level in the PN in increments of 600 mm. The claddings, the base of which are wall profiles, are fastened with a cutter, and the ceiling ones - with self-tapping screws. PS should be 10 mm smaller in size from the distance from the ceiling.
After the “skeleton” is ready, Knauf sheets are attached without forming cross-shaped seams between adjacent rows (“spreading”). The joints of the sheets and the places where they are fastened with screws are puttied.
Stages after leveling the walls
It is also necessary to decide what the ceilings will look like, namely, from what components they will be made. If it is plaster, then work must begin immediately after the completion of the previous cycle, and if it is tension work, then it must be done at the very end of the finishing work cycle. If the ceiling is suspended, it can be mounted both after the screed and before (dry screed option).
As soon as the walls are leveled, you need to start screeding.
After all the finishing work has been completed, finishing is carried out from top to bottom. Wallpaper – doors – floor and floor screed – trim – plinths.
For convenience and, most importantly, speeding up the repair cycle, the specialists of the Level Floor company are ready to offer you comprehensive services for leveling walls and floors. We have developed a new Promotion, “Flat Floor – Flat Walls”. When you order a set of services, we will provide delivery and unloading for you free of charge.
If you don’t want to trust your repairs to different contractors, we are ready to offer you a comprehensive turnkey repair. We will visit a specialist and prepare a repair estimate free of charge for you. We will take into account all your wishes and, if necessary, offer different variants repair Turnkey repairs start from 4,500 RUR/m2 for the floor. The cost includes the renovation of the bathroom.
With respect to you,
Specialists of the company "Rovny Pol"
Video on preparing and leveling walls before finishing
This video describes the process in detail leveling walls with plaster. consists of the following parts: description of tools for plastering works, installation of beacons on the wall being leveled, and the process itself of leveling the wall using a plaster mixture. Material provided by the video encyclopedia "World of Repair".Video length 05:12, good quality (recommended viewing in full screen mode)
viewing The video describes the process leveling walls using dry mixtures. This or that mixture is used depending on the type of wall covering. Material provided by the video encyclopedia "World of Repair".
The length of the video is 10:11, the quality is good, it is recommended to view it in full screen mode)
viewing The video describes full cycle ceiling leveling. A wall is taken as an example of alignment. Therefore, this video can be freely used in the form instructions for leveling walls. Moreover, the technologies for leveling walls and ceilings are almost the same. The videos are commented on and performed by superstroy specialists.
Video length 04:59, good quality (recommended viewing in full screen mode)
viewing The video describes groove cutting technology in the walls. Material provided by the video encyclopedia "World of Repair".
Video length 04:06, good quality (recommended viewing in full screen mode)
viewing
Finishing and preparation of ceilings and walls, ceiling repairs, ceiling leveling
Currently, consumers have a special attitude towards plain walls and ceilings: most often they can be found in office premises. However, in the most expensive and sophisticated Moscow apartments, the walls and ceilings are finished to perfection, then painted with clean, bright colors. This indicates the good taste of the owner of the house and his readiness to make sacrifices in material and time terms.
Finishing walls, leveling walls and finishing and preparing ceilings for painting only the most highly qualified painters can do it. This is a little longer than just wallpapering. The finishing of walls and ceilings is carried out in several stages: plastering, puttying, are carried out in a strict technological sequence in compliance with the deadlines for the work. Result high-quality finishing ceilings, wall preparation always meets expectations.
At finishing office walls are painted in soothing colors, work is usually carried out as quickly as possible short time, so in these cases new ones are used modern technologies. Found widespread use in most offices special wallpaper, which after gluing on aligned and the prepared walls are painted - wallpaper for painting. On the one hand, painting walls allows you to play with color, on the other hand, it allows you to choose different textures of wallpaper, and, finally, the technology itself is significantly simplified. This is the most popular finishing method.
Types of work on finishing walls and ceilings performed by the company’s craftsmen:
- ceiling repair after leaks
- painting the ceiling after a leak
- ceiling preparation (cleaning)
- wall preparation (surface cleaning)
- cleaning from deposits and dirt
- sealing cracks and rusts
- gluing cracks, joints, rusts with serpyanka
- leveling walls for painting (plaster)
- leveling ceilings for painting (plaster)
- putty of walls (ceilings)
- priming the surface prepared for painting
- whitewashing of ceilings
- painting walls, painting ceilings
Interior wall decoration by hand
Decorating the walls in an apartment begins with preparing the walls. In any case, regardless of which wall decoration option you choose, they need to be prepared.
The wall must be treated with a layer of primer; this must be done both in the case of decorating the wall itself and in the case of its extension, for example, with a structure made of plasterboard or MDF or PVC panels.
Before we tell you about the procedure for finishing walls, let's first look at the materials that are used for finishing in a particular room.
Starting materials for wall decoration
Let's start with the preparatory materials used to decorate the walls in any room. Today, the most basic preparatory materials for wall finishing are:
- Drywall;
- Plaster;
- Putty.
These materials are used to obtain a perfectly flat wall surface, eliminating unevenness and slopes. It is illogical to carry out any wall finishing without solving the issue of leveling it, since any material will not look aesthetically pleasing, having unevenness, roughness and other defects. If earlier repairs were carried out without leveling the walls, due to the lack of materials or their high cost, now these problems are no longer relevant. So, let's look at the materials listed above in more detail and analyze in what situation they should be used.
Wall finishing with plasterboard
Drywall is the most the best material for leveling both the surface of the wall and its plane. As such, plasterboard is not a finishing material, but is its basis, that is, plasterboard itself is the basis for finishing the wall. Simply put, with the help of drywall we are building up the wall and we will not need to level it as such. This option suitable in cases where you have a very uneven surface walls, that is, when there are unevenness on the wall, or when the wall itself is uneven and goes to one side, and you want to save time and money on leveling it.
For construction plasterboard construction we mount metal profiles on the wall so that they pass crosswise under the sheets of drywall, for their reliable fixation. If the walls are very uneven, then in the best possible way There will be a plasterboard structure constructed at a short distance from the wall to make it easier to bring it to zero level. We process the seams of the plasterboard sheets using masking tape and putty, and then we putty the plasterboard sheets themselves.
Wall finishing with plaster
Plaster is another common wall finishing option that performs 2 functions: leveling the wall and preparing for the application of the final layer of finishing material. Plaster is used in cases where the wall has both an uneven surface and an uneven plane. The undoubted advantage of plaster is the ability to apply it in a thick layer and in several layers.
Plastering walls is done as follows. If you use a dry mixture to decorate walls, you must first dilute it with water, but if you bought a ready-made, diluted mixture, then you can immediately start working. Apply the mixture to a previously cleaned and primed surface using a spatula, from bottom to top. After applying the plaster, check the evenness of the wall using a level.
Wall finishing with putty
An alternative to plaster is putty, but it has several disadvantages in contrast to its twin. Firstly, the putty cannot be applied in a thick layer, since its layer should not exceed a couple of millimeters, and secondly, the putty can only be applied in one layer, given that this will be the final layer on which wallpaper or paint will subsequently be applied. Putty is used in cases where it is necessary to level out minor unevenness on the wall surface.
Finishing walls with putty is done in the same way as in the case of plaster, with the exception of the only nuance - the layer of putty must be very thin.
Finishing the walls in the room
What materials are used for finishing the walls?
Wallpaper
One of the most common types of wall decoration is wallpaper. Wallpaper is usually used in living rooms: living room and bedroom, as well as in the corridor. To a lesser extent, wallpaper is used in the kitchen, and even more so in the bathroom, due to its impracticality.
Let's start, perhaps, with the positive properties. Wallpaper significantly transforms a room, unlike painting, it has beautiful patterns, designs, ornaments, as well as various color shades. Thanks to wallpaper, you can create a variety of design styles in your room. Also the wallpaper is environmentally friendly pure material, which is a definite plus, especially for a children's room.
Now let's touch on the disadvantages of wallpaper. The first and significant drawback is fading; despite the price, wallpaper loses its color over time. The disadvantages include the wallpapering procedure itself, since the rolls in the corners need to be measured, trimmed and adjusted. If you have expensive and dense wallpaper, then you need to glue it end-to-end, not overlapping. If such wallpaper has a pattern that should create a single pattern with adjacent strips, then each subsequent pasted strip will need to be adjusted to the previous one according to the pattern.
Why is it not recommended to glue wallpaper in the kitchen and bathroom? As for the kitchen, the fumes that settle on the walls are very difficult to clean from the wallpaper. Due to high humidity and steam in the kitchen, condensation may form on the wallpaper. For the same reason, it is not recommended to use wallpaper in the bathroom.
Almost all finishing decorative coverings walls require a level base.
There are only a few of them that can somewhat hide unevenness, but the limits of what such coatings can do is quite limited.
They can hide only small cracks or make unevenness invisible through the use of light shades of decorative coating.
In most cases, the walls must be prepared before applying the finish. All types and methods of leveling walls in an apartment can be divided into two large categories:
- wet leveling.
Various water-based building materials are used. various types, putties, special building mixtures with the addition of modifiers to give them specific performance properties;
- dry leveling.
For work, only dry materials are used; during work, aqueous mixtures are not used at all or their quantity is extremely small. For leveling, plasterboard, OSB boards or sheet plywood are used, edged boards etc.
In order to make it easier to make the optimal decision in each individual case, it is necessary to become more familiar with these two methods of performing work.
Most reliable way, used on brick or concrete walls. Some have special additives, which allows you to combine leveling with minor insulation, etc.
It is best to level the walls with plaster plaster mixture Rothband.
This is a good way to level the walls under the wallpaper. The cost of plastering walls ranges from 250-35  0 rub/m2.
Putties can be used to smooth out relatively small irregularities and cracks.
Work is completed quickly and with minimal costs manual labor.
The price for services for leveling walls with putty starts from 300 rubles/m2, depending on how and with what the final decorative finishing will be performed.
Advantages
The highest strength indicators, the most long time operation. The ability to level walls with large deviations along the plane, however, in this case the work must be carried out in several stages.
Too thick a layer of plaster applied at one time will certainly crack during drying.
The advantages include the relatively low cost of the work.
In many cases, ordinary paint is used for plastering. cement-sand mortar, cook it yourself. You can also use complex solutions that have water protection, but such work is carried out in exceptional cases in special-purpose premises.
Flaws

Plastering is a time-consuming process; only professional builders can perform this work.
Quite a lot of construction waste is generated; leveling with plaster can only be done in non-residential rooms.
If the apartment is being renovated, then all the furniture has to be removed from the room, and there is a high risk of damage to the flooring.
Dry wall leveling
You can cope with unevenness of varying depths, work is completed quickly, walls are leveled quickly, and the resulting surface is perfectly flat. The use of plasterboard boards for leveling has now become very popular.
The main reason for such popularity is the manufacturability of the material.
It is easy to cut; when working with slabs, there is no need to use special expensive tools and devices.
 But from the point of view of consumers, this material has one very significant drawback - low physical strength. Even under moderate dynamic or static impacts, plasterboards lose their integrity.
Glued plywood and OSB boards have much better physical strength characteristics. But their price is higher than their plasterboard counterparts, and they are also somewhat more difficult to work with.
In addition, plywood and OSB boards have many other disadvantages. This is what can explain why drywall is so widespread.
You need to use plasterboard carefully, carefully select the slabs based on thickness and moisture resistance, taking into account specific operating conditions.
Advantages
The work is done quickly, the walls can be made perfectly smooth. After leveling the walls with plasterboard, you can use any materials for decorative finishing.
Flaws
The relatively high cost of work, the price of materials and additional elements can significantly exceed the cost of plastering.
Several ways to level walls with plasterboard
Today's technologies make it possible to level walls with these materials in several ways.
- or wooden sheathing.
Used to level out large uneven areas and can be used on brick, concrete and wooden walls.
Advantages - there are no restrictions on existing unevenness, it is possible to perform simultaneous insulation.
Disadvantages - manufacturing the frame requires time and additional financial costs, decreases effective area interior spaces.
 People also call it.
Plasterboard slabs are fixed to the surface of the walls with liquid nails, the solution is applied in several places on the slab.
Advantages - speed of work, savings Money for the purchase of frame elements, high labor productivity.
Disadvantages - only small unevenness can be leveled if the execution technology is violated construction work the risk of plasterboard slabs coming off from the wall surface increases significantly.
Some “masters” additionally fix the slabs with dowels for insurance. This is done not out of concern for the customer, but because of the lack of qualifications of the performers.
In Moscow, the cost of leveling walls with plasterboard slabs is 550-600 rubles/m2. More specific values depend on the number of layers of drywall and material of manufacture load-bearing structures.
How to choose a wall leveling method
When choosing methods and methods for leveling walls, you need to take into account the maximum number of existing factors:
- Number and size of irregularities.
- the walls are new or old rooms have to be renovated.
- Wall material (concrete, brick, wood, etc.).
- Operating conditions of the premises, what their final purpose is, what indicators will be in terms of humidity and temperature.
In addition, it is advisable to take into account the time allotted for leveling work, the financial capabilities of the customer and the properties of the materials intended for finishing the walls.
Of course, one of the first places is occupied by the qualifications of the performer. Some leveling methods require many years of practical experience. You shouldn’t believe fairy tales that “everyone can do this without much effort.” Each job requires not only theoretical knowledge, but also practical experience.
The walls are the first thing that catches your eye in an apartment. Their uneven surface can greatly spoil the impression of a home, even if it is incredibly pompously decorated. IN simple interiors wall defects are especially noticeable. The only way out in this case is to level the surface. Of course, you can use the services of a specialist, but try to do it yourself. I am sure that with our recommendations you will certainly succeed.
Preparing for leveling
Before leveling the walls, you need to perform a number of operations. First you need to set the boundaries of the irregularities. To measure horizontally, you can use a cord that is pulled tightly along the wall. It’s even easier if you have a building level at least 1.5 m long. To calculate vertical unevenness, use a plumb line. Differences of no more than 3-5 cm are leveled using special building mixtures. In this way, it is possible to level more crooked walls, but this will take a lot of time and money.
This is the so-called wet method alignment of load-bearing structures. In the dry method, the walls are sheathed. It is used if the walls are too crooked. The latter method is more labor-intensive, but allows you to achieve a perfectly smooth surface. In both cases, the key to success is strict adherence to the sequence of actions.
Plastering must be done quickly, because the solution dries quickly
Regardless of the method chosen, it is necessary to take a responsible approach to leveling the corners. Curvature, imperceptible at first glance, may appear when installing curbs or.
Plaster or drywall: pros and cons
Both types of wall alignment have both positive and negative qualities. For need pre-cleaning surfaces. Elements of old plaster can affect the quality of installation of the material using special glue.
Behind the installation you can easily hide noise and heat insulating materials, hide communications and wiring. The problem is that drywall slightly reduces the size of the room and can withstand less load than walls covered with mortar. Pay attention to the color of the drywall sheets. The moisture-resistant material is painted green, and the regular material is gray. In bathrooms, kitchens and other rooms with high humidity, it is better to use gypsum board sheets.
If you prefer building mixtures, the room will retain its original dimensions. However, there are some problems here too. The surface will be monolithic, without gaps between the wall and the layer. On curved walls, a large layer of mixture is obtained, up to 5-10 cm) and a lot of material is required. As a result, this method is not often used. To carry out such repairs, you will need to remove all the furniture, and after completion of the work, carry out a thorough cleaning of the room.
Plastering walls
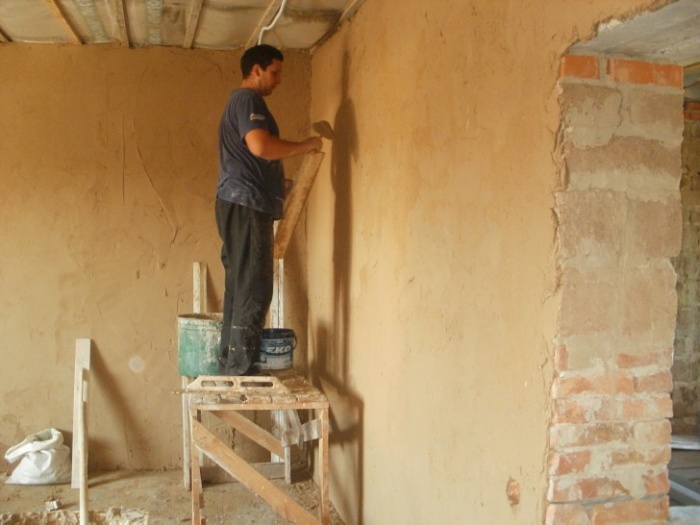
Before starting work, you must completely turn off the electricity in the apartment. Afterwards, the surface is thoroughly cleaned of old wallpaper, plaster or paint. Then treat the surface with a primer. In this case, the building mixture will be better fixed. The primer increases moisture resistance and prevents delamination of materials. For cement mixtures, a solution of cement, water and sand is used. To make the wall as smooth as possible, beacons must be attached to it. To do this, profiles are installed on the sides of the wall. The verticality of the beacons is checked with a plumb line.
Dilute about 10 liters cement mixture and apply it to the wall with a construction spatula in large strokes. Then level the solution along the beacon lines from bottom to top. To do this, use a level or wooden plank. The solution must be added until the wall surface is leveled along the beacon lines. When using a spatula, you must tilt it 45 degrees. In this case, the surface will be perfectly flat. Don't forget about the corners, be especially careful in their finishing.
Economical method of leveling walls (Video)
When working with dry mortar, pay attention to both the thickness of the applied layer and the type of binding material. For finishing living rooms, gypsum-based compositions are usually used. This material maintains the indoor microclimate well. Cement mortars Mainly used in high humidity environments (bathrooms and kitchens).
How to level walls with plasterboard
The second and most popular way to level walls is to use plasterboard sheets. It is usually used if the size of unevenness on the wall is more than 5 cm. Plasterboard wall must be protected from moisture, freezing and condensation. To securely attach the drywall sheets to the adhesive, it is recommended to clean the wall from any remnants of the old mortar. Then the surface is primed.
If the wall surface is loose or porous, it is better to use deep penetration soil. It is applied by spray or paint brush. A special primer marked “betonactive” is applied to concrete and other low-porous surfaces. Before you install plasterboard sheets, don't forget to do the wiring. Socket boxes must protrude at least 20 mm above the wall surface.
After completion of the plastering, the beacons are removed, and the stripes after them are rubbed over with plaster.
Glue plasterboard sheets directly to the wall or install on metal frames. Uneven corners are eliminated using special metal profiles. To install this type of structure, you must use self-tapping screws, dowels and a screwdriver. Places for metal structures are marked with a pencil.
Leveling walls with your own hands is not a simple process, which even a beginner can handle with effort. First you need to decide on the desired result and method of work. There are several ways to level walls with your own hands; in each case there is an optimal option.
Types of alignment
Based on the operating technology and material, a distinction is made between dry and wet leveling. Dry leveling is advisable to use in rooms with large surface errors, in wooden houses. Wet leveling is used for both minor and noticeable deviations. Let's take a closer look at how to properly level walls using each technology.
Dry leveling
Dry leveling, also known as frame leveling, significantly saves costs compared to plastering a falling wall - this is an important advantage.

To begin work, the necessary material is calculated:
- the guide profile is purchased in double the perimeter size;
- rack profile - the quantity is equal to the ratio of the perimeter of the room to the width of the drywall (standard 1 m 20 cm), multiplied by two, plus 4 corners;
- anchor wedges or dowel nails - divide the perimeter by 50 cm and multiply by 2;
- screws for metal - multiply the number of rack profiles by 4;
- GKL - divide the perimeter by 1 m 20 cm;
- self-tapping screws for gypsum board - divide the perimeter of one sheet by 60 cm and multiply by the total number of sheets;
- serpyanka - the number of rack profiles is multiplied by their height;
- deep penetration primer - 150 ml per 1 sq. m.;
- putty for seams - consumption varies depending on the manufacturer;
- putty on gypsum board.

Frame alignment allows you to create the ideal geometry of the room; it is suitable for any type of finishing.
Using a laser level, the frame of the structure is marked, the guide profiles are attached with anchors or dowels along the marked marks on the ceiling and floor.
Rack profiles are cut at the ends, petals are created through which self-tapping screws are screwed. They are inserted into the guides and fastened at a distance of 60 cm from each other.
Sheets of plasterboard are screwed to the finished frame in 0.6 m increments, and the heads of the self-tapping screws are sunk in.
The seams are rubbed with a special putty; it is more elastic. To avoid the appearance of cracks, sickle is embedded into the putty.

To finish leveling the surface, putty is used: a mixture is prepared and spread over the entire surface. In order to save processing time and the cost of the finishing layer, it is worth choosing gypsum boards with beveled edges, then the difference in height will be insignificant. You can cut the edges yourself.
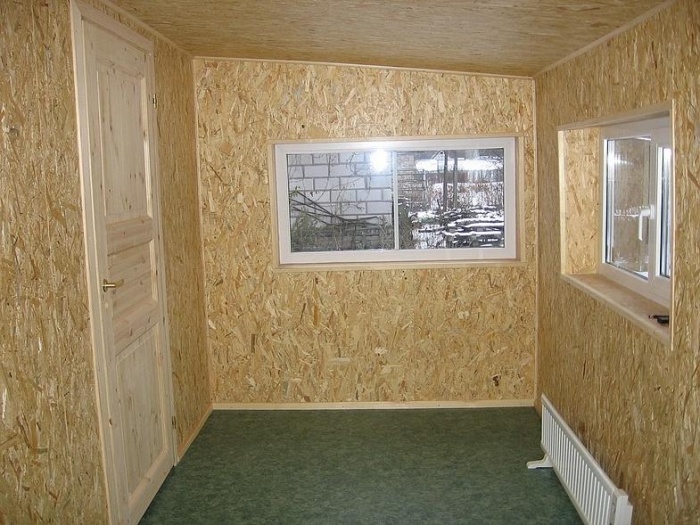
In addition to plasterboard, other materials can be used for frame leveling: fiberboard, chipboard, pvc panels, plywood, lining and more modern OSB board.
Advice! The choice of alignment method depends on personal preferences and financial capabilities. Therefore, before starting repairs, it is worth describing all possible types of finishing, their cost, and then making a decision.
Wet leveling
Leveling walls with a mixture is a more labor-intensive and messy process. But it allows you to save space, and in some cases, finances - with minor deviations, the consumption of mixtures will be less. The alignment method depends on the requirements for the final result.

There are two ways to do the work: by beacons and by rule. Perfect alignment of wall corners is impossible without beacons and corner elements. This labor-intensive process is relevant for the bathroom and kitchen. Here the geometry of the room is very important; when installing furniture of the correct shape, minor errors become noticeable. Leveling recommendations from professionals:
In practice, two methods are often combined: walls with windows and doors are aligned using beacons, and other walls are aligned according to the rule. Also, rooms with external corners require careful alignment according to the beacons.

The choice of mixture for leveling the walls depends on the finishing coating. This could be wallpaper, paint, decorative plaster.
The alignment of walls under wallpaper depends on its type:
- for a light thin coating you need a light base without the slightest errors;
- glass wallpaper and vinyl wallpapers dense texture can hide minor imperfections in the base;
- Liquid wallpaper, depending on the grain size, requires a perfectly flat surface or allows small flaws.

Leveling walls for painting always requires a perfectly flat surface. Involves several stages of puttying and the use of a high-quality mixture. The choice of polymer putty allows you to prepare the surface for painting in one stage of puttying without sanding and re-plastering.
Coarse-grain decorative plaster does not require puttying of the walls; plastering is sufficient for a smooth base; smoothness does not matter.
Important! Regardless of the number of layers and finishing coat, each stage ends with a primer. It is necessary for better adhesion of layers and saving material.
Difficult cases in alignment
How to level walls in wooden house? For this case, it is permissible to use both methods of work, but the frame option is preferable. The technology of work is the same as described above.
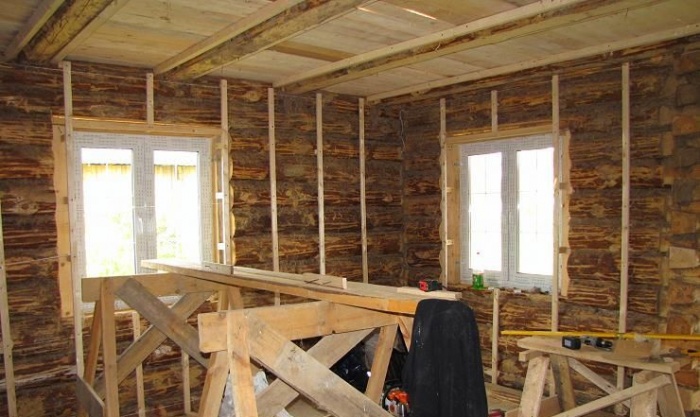
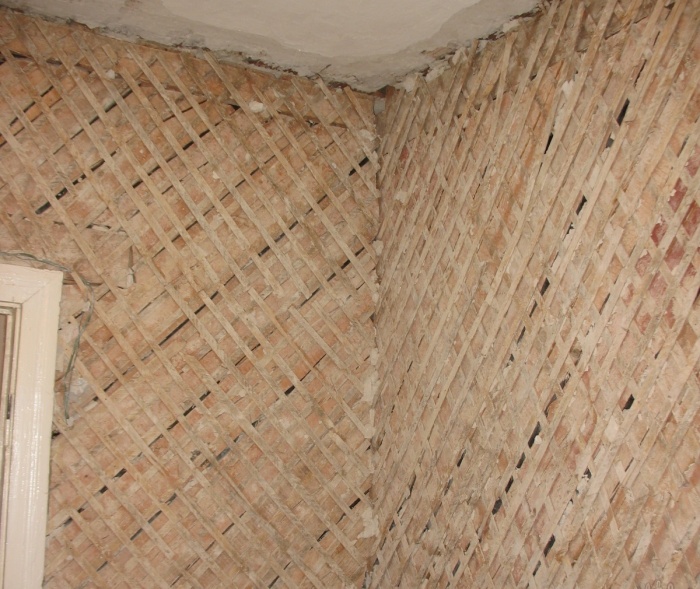
An important point is the height of the cladding material in a non-settled house; it should be 5-10 cm fewer walls. Leveling with a mixture is a more labor-intensive process: it requires careful treatment of the walls with an adhesive compound, attaching shingles or mesh to hold the plaster. Preliminary cladding for plastering looks like this.
Even in modern new buildings you can find clay walls. This material is characterized by low cost, good hygroscopicity - ideal for use in residential premises. How can you level rare clay walls?
In fact, nothing complicated: leveling occurs by plastering and filling with lighter or more balanced mixtures. Gypsum or clay mixtures are suitable for this.
Aligning the outer corner of a wall with your own hands becomes much easier if you use a special perforated corner. It can be narrower or wider, depending on need. The corner creates perfectly even sides and remains in the plaster. For puttying, it is convenient to use a special corner spatula, which will require a minimum of skill and effort.
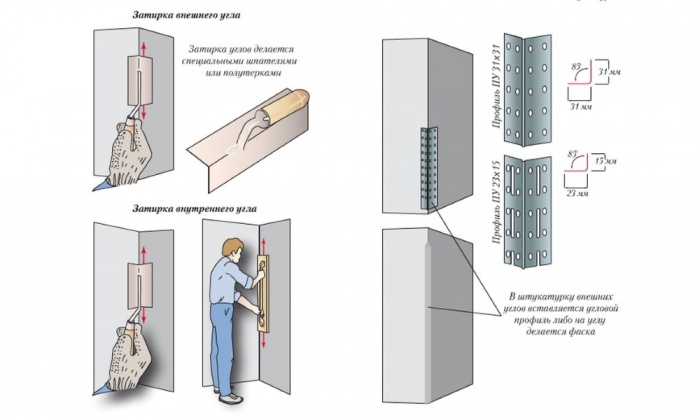
Aligning corners in a room of irregular geometric shape with your own hands is a very labor-intensive process. Using drywall will take up more space than plastering, but will go faster. In any case, the corner elements are installed perpendicular to each other. Then, in line with them, beacons are attached to the alabaster wall along the wall. The laser level simplifies the process of aligning beacons and corner elements. The most crucial moment has been completed; all that remains is to fill the space between the beacons with plaster.
Material selection
For high-quality finishing, its speed, and ease of work, material and tools are important. You shouldn't skimp on them.

Mixtures for leveling walls are available in different grain sizes and whiteness. The more expensive the mixture, the less hassle it will be. Particularly convenient are ready-made compositions of plasters and putties, which are ready for application without dilution with water. Such mixtures are characterized by long-term retention of properties even in open form, which is very important for beginners - after all ordinary solutions They dry quickly and are inconvenient to apply. Ready-made formulations are sold in buckets; after use, leftovers can be stored in a bucket until the expiration date.
White putty saves painting costs and is necessary for light-colored wallpaper. Therefore, when choosing, it is worth specifying the color of the mixture if you need to align the walls in the apartment with wallpaper.

High-quality drywall does not crumble or chip - its processing will be much faster. The presence of factory chamfers (image above) on the sheet saves the overall consumption of the finishing mixture and time for finishing. The same applies to profiles - rigid profiles create a strong frame and are not subject to deformation during installation.
Advice! Choosing cheap material, you should not count on quick repairs; such savings will require more patience and skill in work.
It's nice to improve your home yourself, but the wrong approach can spoil the mood. Before starting repairs, you need to soberly assess your strengths and study the necessary information. You can always entrust the work to professionals.
In old houses, the walls are not always smooth, and in new buildings, developers very often overlook obvious defects and flaws. They can be bumps, cracks or chips. It happens that the horizontal or vertical planes are not level. Premises with such defects look unpresentable. Because Decoration Materials for walls must lie on a perfectly flat surface, you have to level the walls yourself or invite specialists. You need to be especially careful when leveling the walls under the wallpaper, because all errors, even the smallest ones, easily appear through the paper.
Wallpaper is considered the most popular and best-selling finishing product for interior cladding. Now we are offered a fairly huge selection of wallpapers with different textures and colors. Wallpaper also differs in the backing, which requires a certain adhesive composition, but in terms of the principle of pasting and appearance on the wall, they are all similar to each other.
Before pasting any wallpaper (non-woven, vinyl or paper), all preparatory measures must be completed. To make the wallpaper look perfect and maintain its appearance for a long time, it is important to properly level the walls.
Before you start work, you need to decide how to level the walls. Factors affecting right choice building materials for leveling walls:
- size and number of defects;
- economic component;
- deadlines for completing quality work.
Leveling methods and materials used
There are two main materials for leveling walls:
- dry material;
- liquid mixtures.
Methods by which alignment can be achieved:
- putty;
- plaster;
- use of drywall.

Before deciding on the upcoming choice of material, it is necessary to evaluate the quality characteristics of the existing walls. You can consult either repairmen or a seller at the construction market.
putty
If the wall plane has small defects and flaws, then putty can be used as a leveling compound. It can be found in the form liquid composition, which is ready for use, as well as in the form of dry mixtures that must be properly diluted before starting work. It is usually written on the packaging container how and in what quantitative proportions this should be done.
This option for the initial preparation of the wall before finishing is considered classic. It is chosen by most buyers.

The technology of leveling walls under wallpaper using putty is a careful application of the composition. Before this, the required steps are:
- Preparing and cleaning walls from obvious defects.
- Application of an antibacterial composition.
- Surface primer.
Then the finished putty mixture is evenly applied to the walls with a long spatula. You will also need a small tool with which it is convenient and quick to draw the liquid solution from the container. Some people find it more convenient to apply the composition onto a surface with a small spatula.
Leveling walls under wallpaper with your own hands using putty is quite easy to do; even those who are doing it for the first time can cope with it. The main thing is to do everything extremely carefully, do not be lazy to remove small excess material before it dries.
In many cases, several layers will be needed, the first of which is called the starting layer. A special mesh is required between the layers to prevent small cracks from appearing in the future.
The starting and finishing layers should be perpendicular to better perform the plane leveling technology.

The last layer should be quite thin. It gets washed away in the end primer composition. After the final completion of the work being performed and the product has completely dried, it is necessary to go over the putty areas with sandpaper suitable for this task.
After the putty composition has completely dried, another layer of primer must be applied to the wall.

Plaster
How to level walls for wallpaper using plaster? The question arises for many novice craftsmen and those who are starting repairs for the first time. This material is used in construction and finishing works interior spaces have been used for a long time. This is a universal way to get rid of defects on almost all surfaces of premises.
Working with plaster is a little more difficult and takes longer, but the result will be better than if you simply level the walls with putty.

For brick it is better to use mixtures based on sand and cement, for concrete - gypsum, for wood - gypsum and lime, cement and clay. The technology for preparing a wall before application consists of several stages:
- Clean the desired surface from dust.
- Prime.
If the wall is uneven and has a number of significant flaws, you should first apply a plaster mesh to the wall, and then a base layer of plaster, which is approximately five millimeters. After drying, you need to apply a base layer of 6-7 mm.
The finishing layer is applied thinly and only after the previous two have dried. It is needed to ensure that even the slightest defects do not remain on the finished leveled surface.

After completing all the work, you need to sand the walls well to give them an even smoother and even surface. In order to avoid having to redo everything all over again, you need to perform all stages efficiently from the very beginning.
How to properly level walls using plaster? Professional craftsmen who have been involved in all stages of renovation of premises for many years will help you figure this out.
Sheathing with plasterboard
Before pasting curves and not smooth walls It is recommended to use drywall for wallpaper. The material is separate sheets, which are quick and easy to install.
The coating allows you to quickly improve the quality of the walls, but visually reduces the living space of the room, and if the room is already small, then this will be very noticeable.

The method is widely used in buildings or structures that were built a long time ago, where there is no point in using other materials due to high consumption. This significantly affects the financial side of the work being carried out.
The product is environmentally friendly, suitable for apartments or houses where people with allergies or asthmatics live. It is allowed to be used in children's rooms. It is used to significantly increase sound insulation and thermal insulation. It is usually used in bedrooms where it is needed increased level comfort and peace.
For bathrooms or rooms with high humidity, it is recommended to choose moisture-resistant drywall, which has a greenish tint.

If the wall level does not coincide by 70 mm, then before installation you should make a frame from special profiles. Mount the material already on this system. If the defects are not very large, then you can attach it directly to the wall plane using special glue. It is applied to the sheets every 30 cm, along the perimeter. Fastening to the frame occurs using ordinary self-tapping screws.
During installation, it is mandatory to note where exactly the sockets and light switches are located. The material is easy to cut and does not require specialized equipment.
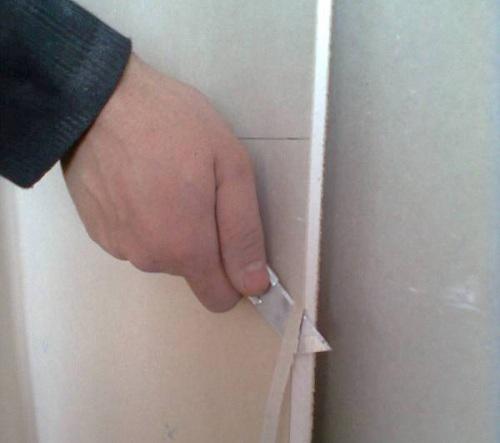
After installing the drywall, you need to very carefully putty the seams between the sheets.

With the help of this product it is possible to give the room not only the effect of smooth walls, but also to different kinds design ideas.
Conclusion
What is the best way to level and how to level the walls in an apartment, everyone decides for himself, but at the same time, be sure to look at the quality of the original plane, as well as the characteristics of the purchased product.
Is it even necessary to level the walls for wallpaper? If this is not done before pasting, then everything will need to be redone later, since subtle defects will become visible. In this case, nothing can correct them.
The entire result of the final appearance of the repaired room depends on the quality of the material used and on the implementation of the leveling technology. The most quick option for curved walls there will be plasterboard, which you can easily install yourself.


. Fill in the missing letters and explain the spelling of the words.")


- Girls and women almost always associate white shoes with a wedding dress, although the white color of shoes has long been no longer required. A...
- New
- Turkey stewed in a slow cooker: spicy, with vegetables, in sour cream, cream and walnuts
- Types of speech: description, narration and reasoning
- Martyrs Tatiana. Moscow Church of St. Martyrs Tatiana Temple of the Martyr Tatiana at Moscow State University schedule
- Milotici: return of the Russian village Moravov Alexander Viktorovich
- Why you shouldn't cry in front of the mirror
- Recommendations: what to grease the pies to make them rosy and appetizing
- Actors Spiderman Aunt May Aunt May in Spiderman
- Pink salmon in the oven - delicious and easy recipes for baked fish Pink salmon fillet baked with vegetables
- What does a lizard tattoo mean?
- Deciphering the natal chart of the house
- What does mulberry help with?
- Photo report “Birthday of Samuil Yakovlevich Marshak in the group”
- Breathing at high pressure Breathing correctly at high pressure
- Bryansk State University named after
- Tasks to test spelling and punctuation literacy
- Application...burning, grow...sti, to...sleep, m...roll, warm...up, sk...roll,...
- The Forex Economic Calendar is a reference book for every trader, regardless of trading experience and level of professionalism, and especially...
- Representatives of the arachnid class are creatures that have lived next to humans for many centuries. But this time it turned out...