Channels for electrical wiring in a panel house. Optimal electrical wiring diagram for a panel house apartment
In old panel houses, not only the apartment electrical wiring diagram, but also the wiring itself does not correspond modern requirements loads and electrical safety. Indeed, in most cases it is made of aluminum wire with a cross section of 2 mm 2.
For modern apartment This is very little, and if you do not replace it during the repair, then a problem with the electrical wiring will certainly appear after the repair is completed. And the old electrical wiring diagrams, when the slightest damage causes the entire apartment to be de-energized, are not optimal and safe.
Selecting the location of electrical equipment
So:
- Before choosing the electrical wiring plan that suits us in the apartment of a panel house, we should do everything necessary calculations. And if design bureaus use special methods and formulas for this, then we can do this approximately, without using complex formulas and numerous coefficients.
After all, the electrical loads of an ordinary apartment are not so great, and the certain power reserve that we will put in will allow us not to worry about the reliability of our electrical wiring. - At the very first stage, we should decide on the number of sockets and lighting equipment in each room. Not only our future apartment wiring diagram, but also the wire we choose, as well as the necessary circuit breakers, will directly depend on this.
- Having decided on the location and number of electrical appliances in each room, we should think about what electrical equipment will be connected to them.
If this is a low-power household appliance (TV, iron, computer, various video devices, etc.), then it does not require a special approach.
If this is powerful electric heating equipment, then its nominal parameters should be taken into account separately. And in some cases it is worth considering the issue of a separate power supply line for such equipment. Note! When connecting powerful electrical equipment through an outlet, pay close attention to its compliance with the nominal parameters of the electrical installation. On this moment
The sockets on the market are 10, 16, 25 and 32A. This parameter must be no lower than the rated current of your electrical installation.
So:
- Now comes the time to select wiring and circuit breakers for our electrical network. According to clause 6.2.2 of the PUE (Electrical Installation Rules), internal lighting networks must be powered by circuit breakers with a rated operating current of no more than 25A. For the lighting network, 16A circuit breakers are usually used, and 25A circuit breakers are used to power electrical outlets.
- To convert the rated power of our electrical appliances into rated current, we use the formula; where P is the rated power of the electrical appliance, and U is the supply voltage (that is, 220V). Having made a simple calculation, we find that an electrical appliance with a power of 1 kW consumes a current of 4.54 A.
To simplify further calculations and create a power reserve, our instructions suggest taking this current equal to 5A. - To select the wire we need, we use the tables in clause 1.3 of the PUE. There are many different parameters given depending on the rated current of the wire, the type of wire, the number of cores, the type of insulation, air humidity, installation methods and some other parameters.
All this will greatly complicate the calculation. Therefore, electricians usually proceed from the parameters that a copper wire with a cross-section of 1 mm2 passes a current of 10A, and an aluminum wire with a cross-section of 1 mm2 passes a current of 5 A. - Based on all this, we find that to power a load of up to 5 kW, a copper wire with a cross-section of 2.5 mm 2 will be required. This is precisely consistent with the maximum permissible load of the input circuit breaker of 25A.
To power lighting networks and low-power electrical appliances with a total power of up to 3 kW, we select a 1.5 mm 2 wire. To protect such a connection, a 16A circuit breaker is suitable.
Choosing an apartment power supply scheme
Circuit with one common power supply
So:
- Apartment wiring diagram panel house directly depends on the total power obtained in our calculations. If it does not exceed 25A, then it is possible to use a circuit with one common wire, from which the sockets and lighting network are powered in parallel.
Surely such a scheme was used during the initial construction of the house. In some cases, it is suitable for one-room apartments. - The advantages of a scheme with one common power supply include:
- Lower final price of materials. After all, we don’t need a separate machine for each power line. And the wire consumption will be significantly less.
- Simplicity and clarity of installation. You simply lay one wire and make branches from it in the necessary places for sockets or lighting equipment.
- No need to install a distribution board. After all, such a scheme implies the presence of only one machine, which is located in your water cabinet near the electric meter.
- The disadvantages of this power supply scheme include:
- Low reliability. Due to damage to any area, the entire apartment remains without tension.
- The need to install additional distribution boxes for branches to electrical receivers.
- For repair work it is necessary to relieve the voltage from the entire circuit.
"European" power supply scheme
So:
- Recently, the so-called “European” power supply scheme has become increasingly popular. This wiring diagram in a panel house apartment implies the presence of separate circuit breakers and a separate power line for different groups of electrical consumers.
- Typically the distribution is made into the following categories. The first group is electrical outlets for one to three rooms. The second group is a lighting network, again, for one to three rooms. The choice of the number of rooms for one group is determined based on their total capacity.

Note! According to clause 6.2.3. PUE in one group should contain no more than 20 lamps or sockets. This rule does not apply only to multi-lamp chandeliers.
- In addition, there are options for powering each individual room from one power line and, accordingly, a separate circuit breaker. Here the choice depends entirely on the nature and type of load and your preferences.
- The advantages of the “European” power supply scheme include the following parameters:
- High security of such a scheme. After all, even if the group protective switch does not operate, the input circuit breaker will turn off.
- High convenience of such a scheme. Indeed, in the event of damage, there will be no voltage on only one group of electrical receivers. The remaining groups will function normally.
- Ease of repair and maintenance. If one of the groups of electrical receivers is disconnected, even if it is not visually visible, it is much easier to determine the approximate location. After all, if you did the installation yourself, then you approximately know where to lay the wires of this group.
- Fewer or no additional distribution boxes.
- The disadvantages of the “European” power supply scheme include the following parameters:
- Higher final cost of such a power supply scheme. This is due to the large number of materials required.
- Higher labor intensity and complexity of installation. Indeed, to lay several lines of wires at once, deeper grooves are required, large quantity wires means more time for its installation and the like.
- The need to allocate additional space for the electrical distribution panel.
Conclusion
The wiring diagram for the apartment is formed not only on the basis of your financial capabilities and wishes. For its safe and reliable operation, the rated values and types of electrical loads must be taken into account. This will ensure that your electrical wiring runs smoothly for many years to come.
In any house built during Soviet times, sooner or later you will have to do major renovation, including the home electrical network. Firstly, the old network can no longer cope with modern loads. Secondly, it was made with aluminum wires, which are now being widely replaced with copper wires. Replacing wiring in a panel house presents certain difficulties. It is not so easy to move an outlet or switch to any place convenient for you. Nevertheless, these difficulties are of a purely physical nature; as for the electrical part, it is no different from installing wiring in ordinary houses. So it’s quite possible to do without a professional electrician by doing the wiring repairs yourself.
What is a panel house?
Panel houses were erected back in Soviet times. They were a kind of economical option because they combined speed of construction and low cost. building materials. The panel structure was erected from reinforced concrete slabs, which were manufactured in special factories by pouring concrete into metal reinforcement. These slabs (or panels) were of two types - for floors or ceilings and for walls.

The panel structure is akin to house of cards, each wall in it is load-bearing. There can be no talk of any redevelopment here; just touch one wall and the whole house will come together. Nowadays such buildings are rarely erected, and people don’t particularly want to buy housing in panel houses. Still for living brick buildings are considered more comfortable. They retain heat better, have increased noise insulation, and, of course, it is much easier to carry out repairs and remodeling in them. Especially when it comes to the issue of how to replace wiring.
Features of electrical wiring in panel houses
The laying of electrical wiring in a panel house was mainly carried out in special channels (or grooves), which were provided and made of iron concrete slabs at the factory.
The locations of these grooves were strictly regulated, as were the openings for switches and sockets.
That is, there was no chance of moving the switching device to another, more comfortable spot. The ceiling tiles also had special grooves for laying wires to lighting fixtures in them.
Another option for installing electrical wiring in a panel house was in the space between the ceiling and wall slabs, this place was then covered with a plinth. The wires were also laid in the joints between the tiles.

Pay special attention to these nuances, because if you have to replace the electrical wiring in a panel house with your own hands, you need to at least know where to look for the routes of the old wires. We should try to use them to the maximum for new wiring, because installing grooves in reinforced concrete slabs is a very labor-intensive task.
The video shows the replacement of wiring on the ceiling laid through the internal voids of the slab:
Wiring options for a panel house
Before changing electrical wiring, clearly decide which method is most suitable for you.
The most affordable option is to lay the wires along the surfaces of the walls and ceilings under the plaster. In this case, the cable is attached directly to the surfaces. You can pre-stretch it into a pipe: steel, electrical, plastic, corrugated plastic, or flexible metallized. Fastening to surfaces is carried out with special clips, clamps or brackets, for which you will need to drill small holes. After the conductors are secured, a layer of plaster is applied. Using this method, you can extend separate lines not only to lighting fixtures, but also to powerful household appliances (air conditioners, water heating boilers).

The disadvantage of this option is that additional monetary and physical costs will be required for plastering the surfaces.
Wiring in a panel house can also be placed on the floor, if later done on top concrete screed. Conductors are pulled into corrugated pipes, laid on the floor and filled with concrete. Place the wires in suspended ceiling. The only drawback is that sockets cannot be mounted on floors and ceilings; you will still have to install them on the walls, and up to this point, trench the surface or lay wires under the plaster.
Replacing electrical wiring in a panel house can generally be done open method gaskets
In this case, the conductors are mounted in pipes or special plastic cable ducts. It is advisable to choose places for installation where the possibility of mechanical damage to the cable box will be minimal. This is, of course, not the most the best option from the point of view of aesthetics, but the installation of such wiring can be carried out when the renovation in the apartment has already been completely completed.

The gating method also remains relevant, only in concrete slabs it will require significant physical and time costs.
Scoring of panel slabs
We have already mentioned that it is prohibited to touch load-bearing panel walls, this also applies to gating. But the ban in to a greater extent refers to the installation of horizontal grooves. Making grooves for wires vertically is quite acceptable. However, there are still some restrictions; the grooves cannot be made too deep, which can lead to weakening of the structure (a depth of no more than 10 mm is allowed). The most important thing when installing the grooves is not to disturb the metal reinforcement.
No zigzags or inclined lines are allowed; grooves for sockets and switches are made in strictly even verticals.
The minimum distance between gas supply pipes and grooves should be 40 cm. From window and doorways grooves for electrical wiring must be removed at least 15 cm.
To cut grooves you will need a special tool, which costs a lot of money. It would be good if you have the opportunity to rent one from a professional electrician.

You need a grinder and a diamond blade is required for it, only it can cope with such a durable material as concrete. On the wall, you must first mark the route for laying the wire, and then make two parallel slits along these lines at a distance of 2 cm from each other. Now you will need a hammer drill; with its help, the remaining concrete between the cuts is removed.
Certainly, ideal option there will be a wall chaser. This tool is essentially similar to a grinder, only it already has diamond discs built inside.
The distance between the discs can be adjusted in advance, as well as the depth of the furrow to be cut.
Another main advantage of the wall chaser is that it is equipped with a vacuum cleaner; installation dust does not extend beyond the casing. The only drawback is the price; in this case, even rental will be expensive.
Hole installation
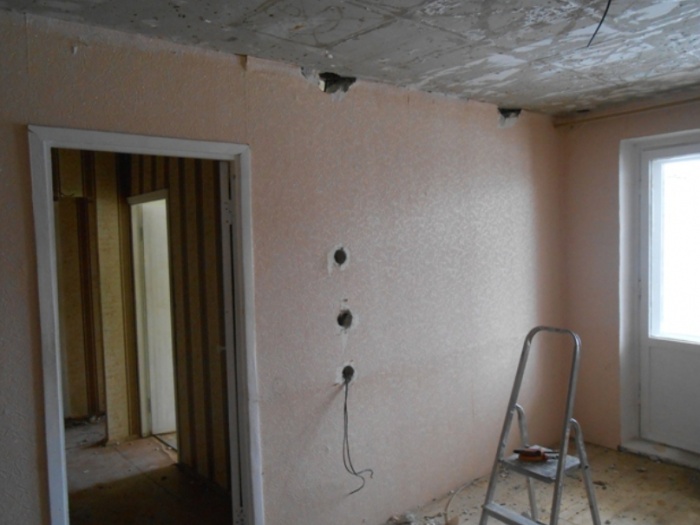
If replacing the wiring in a panel house involves new places for sockets and switches, then another difficult stage of work will be required - drilling holes for them in the concrete wall.

What will you need for this?
- Pencil with a ruler (or tape measure).
- A hammer drill and a drill for it with a diameter of 8 mm.
- A special attachment is a crown for installing socket boxes in concrete (about 70 mm in diameter).
- A shovel is a special perforator attachment for removing the remaining concrete from a hole.
In the place where the switching device should be located in the future, draw a circle along the diameter of the socket box. Determine its center and make a hole 50-60 cm deep in it using a hammer drill with a drill. Now put a concrete crown on the tool and mark the outline of the future hole. Install the drill again and drill 12-14 holes along the intended circle (this makes the hole installation process much easier and faster). Put the crown on again and now drill to the full depth (50-60 mm). All that remains is to put on the spatula attachment and knock out the remaining concrete.
All stages are clearly shown in the video:
Make holes for the junction boxes in the same way if you do not use the old ones.
Distribution panel
As a rule, previously in panel houses the electric energy meter and the input machine for the apartment were installed on stairwells. Now one machine is not enough, the shield is assembled from devices protective shutdown(RCD) and individual circuit breakers for each group of consumers.

In principle, the counter and the input machine can remain on the site. Moreover, this is required by the energy supply organization in order to easily take readings from the meter.
You can assemble the rest of the distribution panel yourself and install it at the entrance to the apartment. In this case, it is best to use a metal or plastic special box, that is, you will have a mounted switchboard. In a panel house, making it hidden is very problematic, just imagine the size of the niche that will need to be hollowed out in a reinforced concrete slab. Choose among the materials at your discretion. A plastic box will be more practical, it weighs less and has a more attractive appearance in terms of aesthetics. The metal box is characterized by durability and reliability.
Think over the cable branching diagram from the input panel in advance.
This scheme is also convenient in that if there is a need for repair work on any of the branches of the electrical network, it will be enough to turn off the required circuit breaker, and not leave the entire apartment without voltage.

Step-by-step wiring replacement
Before changing the wiring you need to remove the old wires. All work must begin by cutting off the power supply to the workplace, that is, you need to turn off the input circuit breaker for the apartment and check that there is really no voltage.
Remove old switches and sockets, open junction boxes and disconnect wire connections. Sometimes in panel houses it is possible to pull out the entire wire from the old furrow through the junction box. But most often they simply begin to carefully pull out the conductor from the box; if in some place it is firmly stuck in the groove with alabaster mortar, then using a chisel and hammer they free it. Basically, if you won’t use some of the old grooves, then don’t fool yourself, leave the old wire there, just carefully insulate it on both sides.

Place the conductors in the grooves for new wiring and secure with plaster or alabaster mortar. Install distribution boxes and socket boxes in pre-drilled holes and insert wires into them. Make the necessary connections in the boxes, connect sockets and switches.
The video shows the result of the work of electricians in a panel house:
We told you the main nuances of replacing wiring in a panel house. This type of work is still considered complex, essentially being a major overhaul of the entire electrical home network. Therefore, realistically assess your strengths; perhaps it is better to invite a professional electrician.
The panel method of housing construction has always presented the inhabitants of Soviet-built apartments with a lot of surprises and surprises. Very often, during the process of renovating an apartment in a panel house, an attempt to hang a picture or knock out a couple of holes in the wall with a hammer drill in order to install kitchen cabinets led to short circuit. The drill or punch came across old aluminum wires in the most unexpected places on the walls.
How the wiring was done in the apartment of a panel house
There is a serious difference in the organization of electrical wiring in an apartment in a brick and panel house. In both cases, the installation of electrical wiring from the panel and meter to sockets and lighting fixtures was carried out according to the wiring map. But the electrician himself determined the locations for installing distribution boxes and grooved channels for laying the wire.
For a panel house, things with electrical wiring were simpler and more complicated at the same time due to the following circumstances:
- Each of reinforced concrete panels was an element power frame and bore a considerable load from the weight of the upper floors and floor slabs; cutting the concrete surface was strictly prohibited, as this could lead to cracks and destruction of the walls;
- The panel floor slabs had prefabricated channels designed for hidden installation and distribution of wires in the apartment, as required by the electrical wiring diagram;
- The quality of the channels was extremely poor, and they were often clogged with rubble and pieces of concrete squeezed out during the production of the slab.
For your information! In addition to the fact that the channels for electrical wiring in the panel house were of poor quality and clogged with waste concrete, their position and distribution were, to put it mildly, suboptimal.
Therefore, in most cases, when laying and routing wires, builders and electricians used niches under the wooden floor on the upper floors, through which most of the wires were routed. Thus, it was possible to output any wiring groups to ceiling lamps, switches and wall sockets, it was enough to punch a through hole in the floor slab.

Inside the apartment of a panel house, electrical wiring was often laid under the baseboards, in the cracks between the ceiling and panel slabs, hiding it behind a thick layer of glass wool and material used to seal the seams. Building codes categorically prohibited the use of panel joints in a house for laying electrical wiring, but in practice the prohibition was ignored; the electrician simply increased the size of the joint between the plates and laid the wiring so that there was space to provide a safe gap.
How to install electrical wiring in a panel house according to the diagram
Within 2-4 years from the completion of construction, shrinkage processes occurred in the panel house with mutual movement of the slabs and settlement of the foundation. In such cases, electrical wiring running into the panel seam could be severed or crushed. At the same time, it was almost impossible to find the place of a fault or break in an aluminum core in the house. It was necessary to resort to the services of an electrician to sort out the tangle of electrical wiring and carry out its repair or complete replacement.

There was a standard layout of electrical wiring in an apartment, as in the diagram above, but adaptation to various projects of apartments in panel houses was carried out extremely carelessly. The main thing was to maintain a uniform load across the phases in such a way as to avoid overload and, as a result, not get phase imbalance.

In many apartments panel houses During repairs, residents repeatedly found plastered channels with holes on the surface of the ceilings, into which, according to theory, electrical wiring should be laid.
Often, the electricians themselves violated the installation rules and did not even try to conduct the electrical wiring as required by SNiP and GOST. Electrical wiring in almost a panel house was always laid along the shortest distance. If the distribution box was at a height of about two meters, and the socket was at a level of one meter above the floor, and even a couple of meters away, the wire was laid diagonally, which made it possible to save money - instead of the required three meters of electrical wiring, lay two and a half. The difference, naturally, could be written off for your needs.

In addition, often instead of one solid piece of aluminum wire, electrical wiring was laid from several twisted sections of wire. The twisted areas would heat up and trip the circuit breaker on the distribution board.
Option for electrical wiring in a two-room apartment of a panel house
As an example, you can look at the wiring diagram for a two-room apartment in a panel house of the standard twenty-first project. In such a panel house, also called frameless, almost all elements of the house, even internal partitions They were load-bearing, so it was impossible to cut separate channels for laying electrical wiring.

According to the diagram, all electrical wiring is divided into three main groups:
- Lighting and sockets in rooms 1 and 2. In each of the rooms, the contact box had its own pair of zero and phase from the distribution board, which made it possible to turn off the power supply and carry out repairs and maintenance of the wiring, using, for example, a chandelier lamp in the corridor;
- Lighting and power supply to the sockets in the corridor are organized according to the same principle with their power supply being routed to a distribution box located at front door. The wiring for the bell and emergency lighting was connected to the same box;
- The third group is lamps and sockets for the kitchen. In panel high-rise buildings that did not have a centralized gas supply, electric kitchen stoves were installed, so a cable with a cross-section of at least 4 mm 2 was used for the kitchen;
- The last group is the bathroom and toilet. Electrical wiring to auxiliary rooms was connected to the input panel directly, without using a junction box.
This is what the actual wiring looks like: two-room apartment, sketched by the owner of the premises.

Instead of building four independent electrical wiring branches, the builders made two lines. One of them, marked in red, was used to supply room No. 2, a kitchen and a toilet with a bathroom. The blue branch of the electrical wiring fed room No. 1 and the corridor. Half of the ideas and ideas included in the wiring diagram for a panel house are simplified to the maximum.
And this is what a modern electrical wiring diagram looks like after repair and alteration with the replacement of one and a half millimeter aluminum noodles in the standard channels of the slabs of a panel house on VVG-3.

Electrical wiring of a three-room apartment
As for a two-room panel apartment, the wiring diagram is based on dividing the input pair on the distribution board into two main branches. The electrical wiring enters the distribution board from the trunk - the well of the panel house. The first branch connects one of the rooms, a corridor and a bathroom. The second is a hall, a second room and a kitchen with a toilet. Lighting for the balcony is done independently by connecting additional wiring from the outer junction box. At first glance, a slight imbalance in the load distribution is striking; the second line seems much more loaded. But this is a misleading impression. The wiring on the second branch is much shorter and has a large number of ramifications. Due to huge power consumption kitchen appliances- for a microwave oven, an oven, an electric stove, the main power copper core goes specifically to the kitchen distribution box, from which not much energy is consumed through branches - room lighting, TV, computer, toilet.
Hello, dear readers and guests of the Electrician's Notes website.
In the previous article, I told you about preparing to replace the electrical wiring in the apartment. Here is a link to. So, let's proceed to further study the material.
But before you start studying new schemes, you need to become well acquainted with existing ones. standard schemes and projects.
I will repeat to you once again that in order to replace the electrical wiring in the apartment, it is necessary to develop a project, and it cannot be otherwise. Because there are many important questions that need to be given sufficient attention:
- calculation of the power of installed equipment
- selection of protection devices (automatic machines, RCDs, difavtomats)
Here are a few examples for clarity: an office power supply project and.
In old houses and apartments there are several standard schemes.

In this scheme, the protective conductor PE is used only for electric stove. It is not used for group lines.
Most often, the electric stove is powered by a three-core aluminum wire with a cross-section of 4 square meters. mm, for example, APPV (2x4), and the power supply for group lines is with a two-core aluminum wire with a cross-section of 2.5 sq. mm, for example, APPV (2x2.5).
If you care about your safety, then you need to periodically check the quality of your electrical wiring. Any (ETL) at your place of residence will help you with this. She has a number of special devices for this. It is also necessary to switch to the TN-C-S grounding system. About it .
I'll bring you clear example: You bought a jacuzzi bathtub or a dishwasher for your apartment. We read the passport and instruction manual, which states that the bath must be powered from a 380/220 (V) network with a grounding system (3-wire network - phase, zero and ground) and an RCD must be installed in the line. or difavtomat.
What kind of house do you have - panel or brick?
Our house is a panel house built in 1991.
Question: is it possible to carry out wiring for 5 sockets from the switchboard in the apartment to the kitchen without using junction boxes (a separate cable from the switchboard goes to each socket)?
Of course it is possible, even necessary. Lately Most projects are done this way with the goal of using a minimum of junction boxes. This option may be more expensive, but each junction box is an additional connection of wires.
Dmitry, good evening.
Tell:
the apartment is old
ancient shield in the apartment
powered by two aluminum wires.
Major renovations have begun. I do almost all the wiring with a 3-core cable. Where can I get earth for sockets?
Alive on the 1st floor. There is a common electrical cabinet nearby. Maybe stretch one core from there, if there is one there.
Thank youIf the main electrical wiring lines in your house are made according to the new standards, then the PE protective conductor must be present in the floor panel. In this case, you just need to connect to it and bring it into the apartment via a PE bus. If there is no “ground” in the floor panel, then check with the management company employees whether there is a ground loop in your house at all? If not, then do the wiring in the apartment as expected (phase, neutral, ground). Later, after the reconstruction of the main networks in the house (if there is one), you will connect the PE bus in the apartment as expected.
Thank you.
I'll try to clarify about RE in the housing office.Found it out.
There is no ground in the floor panel, there is no ground loop in the house, because... old fund.
Reconstruction of the main networks in the building is not expected.
I carried out all the wiring in the apartment with a three-core cable.
Tell me what to do now with the RCD (how to connect it in my case)? And in general, what to do with the missing land, how to protect yourself and your loved ones?
Thank you.Vitaly, as I already said, it is forbidden to install an RCD with such a power supply scheme, according to the PUE. Therefore, the opinion of electricians was divided. Some people recommend installing, while others stubbornly follow the instructions of the PUE. Here's my rationale for the above:
Please tell me what is best for the kitchen, if there is an electric stove, dishwasher, microwave, electric kettle, refrigerator. I think I'll divide it into two groups:
1) for electric stove: VVG 4 or 6mm.kv + automatic, RCD is questionable
2) for everything else: VVG 4mm.kv + automatic, RCD, I don’t know whether or not.There is definitely a separate group for the electric stove. If the stove is modern and powerful enough - more than 9 (kW), then lay a cable with a cross-section of 6 sq. mm over copper. RCD optional.
I can’t say about the rest, because... I don’t know the power, maybe 2.5 sq.mm will be enough - that’s up to about 25 (A) or up to 5.5 (kW). Although it can be laid with a margin of 4 sq. mm. RCD is required.
Thank you for the answer, and for the site too, a lot of useful information, chewed to the smallest detail, for me, a half-trained rural electrician, this is a godsend.
Very helpful information. You can quickly become a “Soviet engineer”!
Why owls an engineer?In 1997, he worked in Germany as an illegal immigrant.
They hired me at the stock exchange in Frankfurt am Main. Who was - knows.
They took it upon themselves to clear a certain area of garbage. But it was delayed for several weeks. I had to knock down one wall that was falling apart, build it and plaster it, lay a concrete screed, lay the walls with clapboards, and in certain places cover them with tiles and a lot various works work like electricity, plumbing, etc.
Finally I installed the lamps.
Babi, a German woman, asked me what the Pakistani owner drove.
You were hired to sweep and you did so many different jobs, what is your specialty?
And what do you think, what was the answer?Hello! Thank you very much for creating a useful and interesting site.
Interesting. If the wiring in an apartment with an electric stove is changed, can the PE conductor for the electric stove be used for common apartment groups?Valera, it’s possible if it’s really a protective PE conductor. This is checked in the floor (accessible) panel or shaft, where the risers (mains) of electrical wiring are laid: A, B, C, N, PE (5 wires) or A, B, C, PEN (4 wires).
If the PE conductor for the slab was connected to a separate protective PE conductor of the riser, then it can be considered a full-fledged PE, and if it was connected to a combined working PEN conductor riser, it means your slab was not grounded, but grounded.
Good afternoon.
All wiring in the apartment is made with aluminum wire.
I want to additionally install a few more sockets and make the wiring to them from copper. I wanted to connect these sockets in parallel with the existing ones
Interested in the following
1.How to make the transition from aluminum to copper
2. Is it necessary to organize “ground” in new sockets (it is planned to connect a TV, computer, iron to these sockets)
Thanks for the answer.I want to replace the old aluminum wiring in my apartment with new ones, and add sockets in different places! But here's the problem, I can't find where the old wiring is located. Tell me how they usually installed wiring in houses built in the 80s and 90s? They are coming from somewhere from the ceiling. And is it possible to lay new wiring in the channels of reinforced concrete slabs where the old wiring was located?
Our house is a panel house built in 1991!
THX!!!2 bedroom!
Alexander, I had the same question, but there was no answer, so I figured it out myself. I have the same house, and as the local electricians said, the wires go through the neighbors above. In your apartment you can only find branching boxes, usually located above the switches. In my house, in the non-load-bearing walls near the ceiling along the wall there is a 1.5-2 cm channel, some of the wires are laid in it, but they will still go somewhere to the neighbors. I did the same: I drilled a hole from the shield into the corridor, laid new wires (though it turned out to be a whole bunch) and routed them through the rooms in the above channels. in order not to make grooves in load-bearing walls, I lowered the wires to the floor level in soft non-load-bearing walls (they can be easily grooved) and laid them under the parquet. spread it all over the apartment. And in the corridor all the wires run along the ceiling; I’ll cover it with suspended ceilings later. best solution I didn't come up with it. Don’t forget to then draw a diagram of where the wires are laid (with dimensions) so that you don’t accidentally drill them later!
Alexandru 09/16/2013
Why do you need old tracks? Forget about them and aluminum. Everything is being done along new paths.Andrey 09/17/2013 You can’t go under the parquet - it’s a combustible material.
The wiring diagram is good, but better photo, and put it into your computer as a memory.Well, you shouldn’t forget about the old tracks at all. Sometimes they are needed. You pull off the old wire and immediately insert a new one. And there is no need to ditch.
Alexandru 10/02/2013
Old tracks are rarely needed. For example, vertical 2m on the wall between the bathroom and toilet in reinforced concrete houses 80-90, or the path inside the panel to the chandelier.
The manner of driving the routes was not mentioned here; personally, I usually lead at vertical and horizontal joints of walls and ceilings - it’s easier there, and all the walls are free for nailing pictures, shelves, and cabinets.
By the way. It is best to document the finished routes on the surface developments of each room. Do you remember developing a cube from school?
And if you take photographs, then first draw distances to landmarks on the walls, imprint dates on the photo (maybe someone can even give you the name of the photo). Otherwise, you can easily get confused in a bunch of photos.Hello, please tell me what scheme to use for grounding in a wooden 2-apartment building, input from air lines two wires phase, zero, I plan to replace all the electrical wiring.
I'm leaning towards the TT system
Hello! I want to praise you for a very interesting and useful site - I learn a lot of new things from your articles for myself.
Regarding this article - is it true? old scheme do you have electricity supply to your apartment? gas stoves? According to it, the difference from the first scheme is only in the absence of a PE conductor. The electric stove remained as it was on the diagram. Yes, and in apartments with gas stoves, the introductory machine used to be installed at a maximum of 25A, or even 16A.For some reason, the author stubbornly puts one machine on all the diagrams for lighting, the other on the sockets, I have never seen this in any apartment - if the light machine turns off, the lights in the entire apartment will go out - walk in the dark. Isn’t it better to make a cross connection, with the condition that in each room the lighting and some of the sockets are powered from different machines?
Alexey 12/26/2013 It’s a pity that so far you haven’t seen normal apartments, where the sockets are powered from some machines, and the lighting from others, and there is no cross-feeding. The author speaks correctly.
Andrey:
Since 2000, reconstruction of electrical networks is carried out according to new standards. All copper wires have a cross-section of 1.5 mm for lighting, and 2.5 mm for sockets.
Wiring in the voids of floor slabs is considered hidden, and hidden electrical wiring. wiring must be replaceable (see PUE). New wiring should be done hidden in grooves along the walls in the floor and in the ceiling (along the ceiling, along the floor, followed by pouring and plastering). You can do it openly in boxes and believe me, with the right selection of box elements, it can be done very beautifully. What is easier for you is up to you to decide.To Vladimir:
You can wire the sockets without boxes, in separate groups. And when installing el. The lighting network requires a minimum of boxes for taps to switches and lamps. It is not allowed to make connections and branches in boxes for mounting switches and sockets, see PUE.Vitaly:
In old houses, the grounding system is TN-C, i.e. the N and PE wires are combined into a common PEN conductor. According to Chapter 1.7 of the PUE, in this case the PEN conductor can be divided on the body of the floor panel, i.e., take one wire N from the ground busbar, and the other PE from the ground bolt and, of course, the phase conductor and introduce 3 wires into the apartment.
The point is that by doing this we reduce the resistance on the PEN section of the wire for leakage currents.
There may be no circuit, but there should be a grounding source for the ASU at home anyway. But if they don’t find it, then the “earth” still “comes” to the house. The 4th core of the supply cable and its armor are connected to the grounding point of the transformer substation.
You can and should connect an RCD; in any case, this is for the safety of you and your household. Even when there are only two conductors. (see RCD brochure edited by V.K. Monakov).
For email plates, the leakage current setting is 10 mA (see Technical circulars of the Association Ros Electrical Installation).Sana:
The admin is right. According to the standards for slabs with a power of more than 9 kW (single phase), copper cable (CU) is 6 mm sq. and the circuit breaker in the panel is 40 A, the RCD is 50 A, the cut-off current is 10 mA. Dishwasher, washing machine, jacuzzi, some types of shower cabins are connected into separate groups, i.e. each consumer has its own circuit breaker. For a kettle, microwave, coffee maker, refrigerator - its own group with a cross section of 4 mm square. with a permissible current of 32 A, the automatic is 25A but not more and taking into account Ki - the equipment utilization factor.I am touched by the video at the end of the article, especially its title “Higher Extreme.” Higher Extreme is the driveway sign in the photo. And I don’t want to believe that 20-30 years ago there were some rules for a while, even though I have a manual from the 80s on electrical installation on my shelf. Is this what you have to be like to build a shed like this? Every time I open something like this ***** I remember all the relatives of the person who did it.
Konstantin, I absolutely agree with you. It’s just scary to be in such shields, by the way, I recently talked about this, like when I changed the meter.
Admin
By the way.
For email plates, the leakage current setting is 10 mA (see Technical circulars of the Association Ros Electrical Installation.
Is the setting too low, taking into account the background leakage of the electric stove?There will be a water heater and a washing machine in the bathroom. Is it necessary to protect each of them with its own differential circuit breaker or get by with one for the washing machine and the water heater?
Boris 12/03/2014 at 21:11
Better put two for the whole apartment.In the diagrams, the input wire is 2.5 mm, and the input circuit breaker is 40A - so the wire can burn out even at 40A?
Alexander, please tell me the PUE point where “Making connections and branches in boxes for installing switches and sockets is not allowed”
I bought an apartment in a panel 5-story building. LenBok project. The wiring is accordingly as old as a house from 1978. I was about to install an automatic 2x4 (gasified house) good repair Well, and accordingly change all the aluminum because the old one is already burnt out everywhere and is not suitable for modern loads. There will be warm floors. Electric oven. (My wife doesn’t want to get used to a gas oven. And I’m not a fan of the heartburn of burnt pies.) There will also be a PC, stereo, and printer. In general, there will be a new shield. I plan to keep it to 36 places. My wife says why is it so big? They say everyone has two or three machine guns and that’s it. And I know exactly the assembly diagram (I’ve already thought it through) and would be glad to post a post with a photo report upon completion) I apologize for such a large deviation from the main thing))) since ShchR will be in the apartment, I decided to entrust the installation of a new copper cable to the housing department employees. Not because I can't. (I am a 4th category electrician) but because I opened the floor panel. It is dangerous to carry out work with partial stress relief there. Lots of dragons. Cobwebs from one and a half sheets. And a lot of bags. I'm allergic to them. In production, I would turn off the riser. But here the distinction no longer allows. And I don’t want to take responsibility. And I don’t advise anyone to work with packet receivers on their own (a very dangerous thing, 50/50 that the outcome will be good. If you’re not sure, don’t interfere! I always try to do a complete voltage release where there are no receivers of the first category. All the best, thank you
Denis Mikhailovich
1. Putting electrical systems in order is a noble cause. But the better you want to do, the more big and small problems there will be. I am an expert in identifying and solving such problems. I'll try to describe some of them. First, the more important and difficult ones.
2. Judging by the cross-section of the input wires, the permissible power consumption of your apartment is 5 kW with an input circuit breaker of a maximum of 20A (it’s good if 25A). And the housing office will categorically not allow you to increase this power from the existing riser, with a corresponding increase in the input machine and the cross-section of the input cable. 5 kW is not too much for a modern apartment, so you won’t be able to turn on quite a lot at once. Private residential buildings have a 5 kW limit, ask around how they live.
True, there are a couple of ways to increase this limit. First: if the housing office allows it, you can lay your own cable to the ASU at home. Second: you can lay your own cable even to the TP.
3. The housing office, in theory, may agree to carry out renovations of the apartment under the contract, but will require going through the standard route: obtaining technical conditions, completing the project, all approvals, etc. All this will cost a pretty penny. Therefore, people usually take risks and do everything without the participation of the housing office. For example, I do all this alone, including work on the riser without turning it off. Of course, you will need to be very confident in the qualifications and courage of the electrician, otherwise the matter may end in a major driveway (if not house) accident with a fire and a fatal accident.
4. Most likely, you will have to give up many electrical amenities - heated floors, electric oven, electric kettle, and other powerful consumers. It is possible that it will turn out that even connecting an automatic washing machine will require separate permission. Or install a load priority relay. In general, you ended up in a house for not too rich people.
On other less important and complex problems you mentioned.
5. The wife will have to learn to make do with less electrical power consumption. You will have to explain to her the convenience of having a large number of power lines and complex and expensive protection.
6. It’s good that you are an electrician. But I assume that your production experience will not be of much use to you in your repairs - the approach to electrics in production and in your apartment is too different.
7. It would be useful for you to tell us about the power supply plan for your apartment; you will be given a lot of the most contradictory recommendations. I myself have extensively splurged on this topic on this site many times, we can try it with you. You just won’t be able to post a diagram and a photo; you’ll have to explain everything in words.For (elalex) you can always come to an agreement with the Zhekovskys. And the opening machine is not a problem. outside it's 25A and inside it's 60A. And the option with your own cable isn't bad either. The liar is on the first floor and I'm on the second. So the length is not great. Well, as an experienced installer, there will always be materials available. Only in Surgut I can’t find an RLV for phase voltage
Denis Mikhailovich 02/21/2015 at 16:41
1. Of course, it can be negotiated with the Housing Office, but for how much and at what level. But with overloaded cables and angry neighbors during an accident, I don’t know. And the machine can be imperceptibly counterfeited, but you can’t hide an awl in a bag - the neighbors will see the thick cables, their low voltage and draw conclusions. I had a case, in a new house one rich tenant managed to take away the electricity from the entire entrance, there was a scandal, he had to run his cable from the street.
2. I wonder, what about the RCD in Surgut? Do you have online stores? In theory, now it shouldn’t matter where you live.House ii-68-01, built in 1974, 16 floors, with slabs. On our panel (corridor panel) in the diagram there is a grounding wire (the one from the first paragraph). Now the actual questions:
1) Where exactly is the ground wire located? If not a wire, then probably a special fitting that goes into the ground under the foundation?
2) Is it possible in the future to power the equipment to ground the stove? Now only the stove is (sort of) grounded, but the rest is not.To the motorbiker 09.15.2015 at 23:54
1. The diagram in the corridor sign is just a piece of paper, don’t pay much attention to it.
2. Don’t look for the grounding wire (grounding conductor) going into the ground - you won’t find it. You will work with the wires that are in the corridor panel.
3. There must be a protective conductor to the stove; in the same way, the rest of the apartment must be protected.
4. Take a photo of the open corridor panel and post it on the forum http://forum-electrikov.ru/ in the “Design of internal power supply” section, come up with your own topic, for example, “Protective wiring for an apartment.”Motorbiker: it’s exactly the same in my 16-story building, but there is no separate grounding wire, there is a common connection point between the entire frame of the house and the grounding loop, which is meant “somewhere there” and the zero of the three-phase line from 1st to 8th, and from 9th to 16th floor. The slabs of all apartments are “grounded” by the middle conductor of an aluminum three-core 3x6 sq. mm to the same common point in the panel and that’s it. Just to the point of snot.
And by the way, everything in the dashboard was done strictly according to the scheme at first, I’ll find it and show you. Then the atrocities of everyone who was both lazy and not lazy began.for surfactants 09/16/2015 at 13:54
1.You seem to be a radio engineer? There may not be a common point of connection between the entire frame of the house and the ground loop, as well as the loop itself. The grounding may be the foundation itself.
2.B panel house incoming neutral wire It is grounded and then goes along the risers as a PEN - at the same time working and protective. In floor panels, PEN sits on their bodies and is distributed onto apartment slabs (TN-C system). Actually, this is not “grounding”, but grounding. If it’s bad for one point in the floor panel, each wire needs its own screw. In radio engineering, everything can be done with one screw.
3.Dangerous voltage will appear on the PEN if the zero is broken.
In my opinion, it’s not as simple as snot. You need to think and understand.What does radio technology have to do with it, is there nothing else to cling to?
Once again, as for an electrician, what was in the house and is almost preserved: floor panels are welded to the fittings sticking out of concrete wall, at these points the zero of the three-phase line is connected to the point of connection of the fittings to the switchboard by means of compression. All “grounding” wires for the slabs are placed on the panel next to the apartment post-metering machines and cannot be switched off.
Each apartment is powered through an automatic circuit breaker that disconnects both the line and neutral wires.
The zeros of the sockets and lighting are connected on a terminal block insulated from the metal of the shield with the zero after the meter.
What is there under the house - guess for yourself.For surfactants 09/16/2015 at 22:08
1.Radio engineering despite the fact that it has a detrimental effect on electrical knowledge and skills. There is a user on the site called kolka, he does not hire anyone who has at least some electrical knowledge and skills. There is a certain logic in his policy: retraining is more difficult than teaching. You even use the terminology of a non-electrician.
2. There is always something to cling to. I guarantee that I will find several gross errors in the apartment after any team of electricians.
3. If your floor panel housings are welded to grounded fittings, this is wonderful.
4. Electricians don’t say “grounding wires.” They say " protective conductors", connected to a protective zero or grounding - the second question.Tell
We need to replace the entire electrical system. wiring in old apartment, the old wiring is 3-phase, is it better to leave 3-phase or convert it to 1-phase, what I mean is: phase imbalance (if 1-phase) if you scatter the phases into groups, there is still imbalance (not all phases will they load evenly, summer-winter, spring-autumn)?
Here's another diagram: two one-room apartments hang on one entrance machine, and two two-room ones on their different entrances, so how can we divide the PEN into different ones?Zheke. Answers.
1. 3 phases are 380 volts. I highly doubt that your apartment, no matter how old it is, has 380 volts. This is not an industrial facility. Let's start with something simple: what is the meter worth? Three-phase? If yes, then you need to leave the circuit as three-phase, otherwise they simply won’t register it for you. But I doubt it.
Now let's move on. If, after all, you have a three-phase load (maybe there is such a miracle after all), then a specialist should do the calculation of the phases and issue a certain project; you are strictly forbidden to go there yourself.
2. PEN has nothing to do with introductory machines and the number of phases, it is the same everywhere: even ten apartments, even three; use any switching scheme. Remember - there is only one PEN.Moreover, in an old apartment! Where are the 3 phases from?
Hello! Thank you for such an informative site. I've been reading it for a day now. You can get the opinion of experts. I bought an apartment in an old building. Here the relatively old wiring lies under the baseboard. More precisely, there are no baseboards, but there is wiring. The sockets themselves are 20cm from the floor - the cable is in a groove. I want to change the wiring, add sockets and so on. The doctor’s question is this: is it possible to take the same easy route and use skirting boards with a cable channel? The apartment is small, there won't be many outlets. The cable is 2.5, of course... I don’t want to make a mess again, but the baseboards with the channel are beautiful))) I’m really looking forward to your answer!
Tatyana, quite. This is called open wiring and it is not prohibited by the Rules. Now there are special plinth cable ducts made of plastic, look at the catalogs of the same DKS, Legrand or Hager. They look decent and install quickly. Also among them you can choose different colors: white, black, wood, etc. By the way, some baseboard cable channels allow you to install sockets and switches directly into them, i.e. there is no need to make a cable outlet into the wall socket, and a socket or switch is installed directly into the baseboard - very convenient, and it looks beautiful and monolithic. In general, there are many options, look in the catalogs.
Good afternoon. How does the overhead light fit into an old apartment? I have a triple switch next to my bathtub and toilet. There seems to be a transformer in it even lower. Which, as my current relatives say, never worked. He paused. The overhead lights went out everywhere. The machine seems to be working. I turned it on and off. The light didn't appear. Could there be a junction box in this switch for the entire overhead light?
Alexey, who can know about your apartment, its wiring, the mysterious transformer, without even looking, in absentia? It’s unlikely that there are shamans here, I haven’t met them yet.
Hello. In the floor board, the management company got clever with the connection diagram for apartment zeros. How can this affect the accuracy of meter readings? And why? After reworking the scheme for one apartment, meter consumption dropped sharply.
Even this is how it was. Corrected in red. All apartments are connected like this.
Nikolay, basically all single-phase meters record only by phase, i.e. control the current flowing through the terminal (1-2). And therefore, if the initial connection diagram of the zeros is not accurate, this will not affect the readings in any way. A decrease in consumption in one of the apartments may be an elementary coincidence - it needs to be analyzed. By how much exactly did it decrease, 2 times or more? What type of meter is installed in this apartment? Have the consumers in this apartment changed? Has your electricity consumption changed? And so on.
Thank you for your reply.
PU Neva 101, the subscriber says that he checked with a water heater. Before the alteration, 40 kW per day, after - 15. But here I also have doubts; not using anything for a day is almost impossible. I thought the same with zeros. Yes, before the alteration, we measured the load with clamps at the phase and zero loads - the readings are different. At zero the load did not show at all.Dmitry, but what if it’s on NP71L. It shows the date incorrectly, but the total consumption will still be shown for the current day? Is a date needed to take readings remotely? Correct me if I'm wrong.
Many people in Moscow have an apartment in a panel-type building. The construction of such buildings did not take much time, which made it possible to provide housing most population of the Russian capital. However, everything deteriorates over time, including utilities in the old building. It is not surprising that replacing the wiring in a panel house is of interest to many people today. You can even change the electrical wiring in your apartment yourself if you follow some recommendations.
Why do you need to change the electrical wiring in your apartment?
A complete replacement of electrical wiring in an old apartment may be necessary in different situations. Over time, switches and sockets reach the end of their service life. In addition, powerful equipment may be used, so old wiring in a panel house or Khrushchev may not withstand such a load. It will begin to melt and sparkle. When planning a major renovation in a private house or apartment, you need to think carefully about carrying out electrical work.
The wiring needs to be changed if:
- old insulation exposed
- a technique is used that requires high power wiring (aluminum wires will not withstand the load)
- the wires are cracked or lost their properties
- the plugs in the shield box are often knocked out
- The lights in the rooms flicker and go out
- sockets sparkle
- it is impossible to connect several devices at once (for example, an air conditioner and a stove)
- heated floors and suspended ceilings are installed
Do-it-yourself electrical installation work allows you to switch from single-wire wiring in a panel house to three- and five-wire.
How is the wiring done in a panel multi-storey building?
To make dismantling/installation of wiring a simpler process, special channels were made when constructing buildings of this type. The specialists only needed to pull the cable through them to install electrical network in room.
Of course, the sequence of channels is different for houses of different series. Unfortunately, it is usually not indicated on the diagrams. This is why it is difficult to find their placement.
Channels run not only in the walls, but also along the ceiling. In addition, old electrical wiring may lie at the junction of the ceiling and wall panel. Often, over time, a cavity forms here, which is filled with plaster. Another place where craftsmen could “hide” the electrical wire is the interpanel seam.
Typically, aluminum wire was used as wiring in panel houses. Its maximum service life is 25 years. This once again confirms the need to replace the old wiring and install a new one.
In addition, it must be said that previously the wiring was done in two lines: for power supply to sockets and for power lighting fixtures(chandeliers, lamps, etc.). A separate electrical cable led to the stove. Nowadays you shouldn't do that.
Replacing electrical wiring in a panel house: preparation
Before changing the electrical wiring in your apartment, you need to carefully prepare. You need a fairly large number of special tools:
- hammer drill with a set of drills and a crown. Using drills you can make holes for dowels, and a crown is necessary for drilling out socket boxes
- screwdriver (negative/positive)
- tape measure for taking measurements
- side cutters and pliers
- chisel and hammer
- spatula for fastening electrical wires and boxes
- soldering iron
- indicator
You also need to buy materials: mounting boxes, dowels, sockets and switches, electrical tape, alabaster, terminal blocks, wire with a cross-section of 1.5 mm.
It doesn’t matter whether the house is panel or brick, the labor costs for replacing the wiring with your own hands will be approximately the same. However, if there is no free time, it is better to immediately abandon the idea and give preference to a company or private master who carries out electrical installation work. A qualified electrician will be able to complete the job more quickly. Although, if you want to do everything yourself and later be proud of the result, you can dismantle and install the internal electrical network yourself.
Features of replacing wiring in a panel house
The first thing to remember: they are not suitable for gating load-bearing walls. This should not be done not only in a panel house, but also in a Khrushchev-era building. Although this only applies to gating in the horizontal direction. Such grooves can significantly weaken the panel structure and its ability to withstand heavy loads.
Installation of new electrical wiring in residential premises should be carried out in old grooves. If the number of grooves is insufficient, or it is necessary to install lamps in new places, the wiring must be laid over the walls and then covered with plasterboard sheets. Of course, this will make the area of the apartment smaller, but otherwise you will have to leave the wiring open.
During the installation of the sheathing, after the wall has been chipped, installation and distribution boxes are used. It is easier to change exposed wiring than hidden wiring. To make a groove, you need to drill a channel using a wall chaser or hammer drill, about 10 mm deep. Using dowels or alabaster, the wiring is fixed there. Recesses for socket boxes should not exceed 45 mm.
DIY wiring replacement step by step
There are several main stages that will have to be completed when completely or partially replacing electrical wiring:
- de-energizing - despite its apparent simplicity, is one of the most important stages. You need to look into the panel and turn off all the machines one by one. Then you should check whether the electric meter is spinning, measure the voltage in the sockets
- dismantling Remove worn wires with your own hands, after first removing chandeliers and lamps, boxes and sockets.
- draw up a placement plan new network for every room, including bathroom, kitchen, toilet
- prepare the surface and perform installation, fixing wires along cable channels and installing boxes
- the last stage is checking the received network and Finishing work. Only after making sure that the electrical network is working properly can you bury wires in the walls, carry out finishing work and glue wallpaper.
Moreover, when implementing electrical installation work In a residential building, some rules regulated by fire safety standards and GOST should be taken into account:
- separation boxes, meters and sockets must be installed in an accessible place
- mounting height of sockets - 30 cm, switches - 90 cm.
- if there is a metal element nearby (radiator, pipe, etc.), the sockets are placed at a distance of 50 cm from it
- in the toilet it is only possible to install electrical sockets with water protection
- in the kitchen you must have at least three sockets, in the apartment at the rate of one socket per six sq.m.
In addition, it is necessary to draw up a diagram of how the cable will be laid along horizontal or vertical lines. This will not only make the job easier, but will also allow you to install the internal network correctly.
There are many ways to lay cables for an apartment electrical network. Installation can be carried out in old channels, which is the safest option, in a screed (with a wooden floor the situation is more complicated), in plaster or under the ceiling if you plan to do suspended ceiling. It all depends on the preferences of the homeowners and technical features premises.
In any case, it is necessary to observe the safety of work and fire safety, building codes. This will install required quantity wires and perform wiring as efficiently as possible.


- Turkey stewed in a slow cooker: spicy, with vegetables, in sour cream, cream and walnuts
- Types of speech: description, narration and reasoning
- Martyrs Tatiana. Moscow Church of St. Martyrs Tatiana Temple of the Martyr Tatiana at Moscow State University schedule
- Milotici: return of the Russian village Moravov Alexander Viktorovich
- Why you shouldn't cry in front of the mirror
- Recommendations: what to grease the pies to make them rosy and appetizing
- Actors Spiderman Aunt May Aunt May in Spiderman
- Making sounds for children Lessons on making sounds for children
- Criteria for preparing an act on write-off of motor vehicles
- Pink salmon in the oven - delicious and easy recipes for baked fish Pink salmon fillet baked with vegetables
- What does a lizard tattoo mean?
- Deciphering the natal chart of the house
- What does mulberry help with?
- Photo report “Birthday of Samuil Yakovlevich Marshak in the group”
- Breathing at high pressure Breathing correctly at high pressure
- Bryansk State University named after
- Tasks to test spelling and punctuation literacy
- Macroeconomic calendar
- The Forex Economic Calendar is a reference book for every trader, regardless of trading experience and level of professionalism, and especially...
- Why do you dream of wedding shoes? Why do you dream of wedding shoes with heels?