We install an Ariston gas panel. Installation of the hob begins with marking the place where installation is carried out
Installation hob- this is a convenient and practical option for your kitchen. Thus, you can significantly save space, which is very important for standard small kitchens domestic Khrushchev buildings. Besides, hobs work on the same principle as solid stoves - so why not replace them with a more convenient option. It is important to note that installing a hob into a countertop is a completely simple process and anyone with a certain set of tools can handle it.
In order to understand the installation process and correctly implement it, it is worth taking a closer look at each of the stages of repair work.
Creating a hole
Those who have ever dealt with similar work should know that there is nothing difficult about installing a hob into a countertop. The video about this work, which is at the end of the article, is real proof of this. In order to highlight all the nuances of installation, it is worth considering the process in detail.
- The first thing you should know before installing the countertop is its dimensions, which will allow you to avoid possible errors when taking measurements. In order to make them yourself, you need to turn it over and determine the width and length using a tape measure;
- We make markings on the tabletop. It must correspond to the parameters of the hob;
- Using an electric jigsaw, we drill a hole from which we will begin cutting. To prevent the cut from crumbling, it is better to use a jigsaw with fine teeth.
Sealing process
The sections that were formed after cutting should be treated with sealant. This is necessary so that the tabletop does not swell, and also to prevent dirt from getting into it.
Important! You can always use aluminum tape to seal the edge. In addition to its basic protective qualities, it can protect the countertop from sudden temperature changes. Pay special attention to the choice of sealant, since the preservation of the appearance of the countertop and its functionality depends on it.

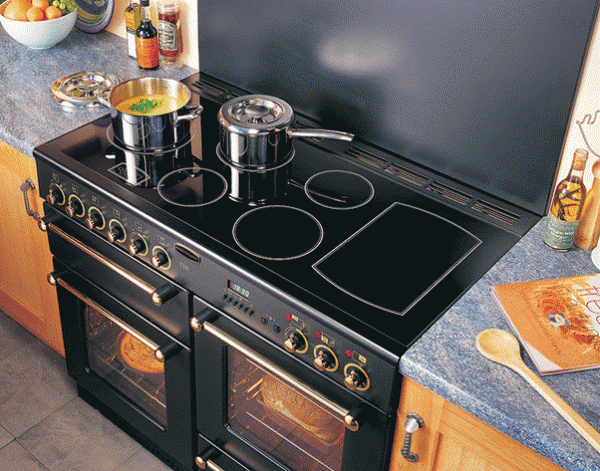
The installation method will also depend on which hob you purchased - electric or gas. Let's consider both options separately.
How to connect the electrical panel?
Demand electrical panels consistently high. This fact can be easily explained by the fact that such devices are very reliable, high quality and durable. However, if such a stove needs to be repaired, it can be disconnected without any problems and taken to a workshop.
Before you begin to install the electric hob, it must be turned over and placed on the countertop. WITH inside The reverse connection diagram will be drawn on the plate. Be especially careful if you have to work with connecting the stove yourself. It is important to connect the wires correctly here.
If there is a separate panel wire for connecting the electrical panel, then there is no need for a plug and socket. Simply connect the wire and install the panel into the countertop. After this, she will be completely ready for work.
How to connect a gas panel?
Initially, you should pay attention to how the panel is attached. Install it into the tabletop, then level and secure. To do this, special brackets are provided at the bottom of the model and plug the electrical cord into the outlet.
Important! Before connecting gas yourself, you should definitely familiarize yourself with the basic safety rules. The gas must be shut off. Make sure of this and only then connect hob to the pipe using a flexible hose.
It is worth putting paronite gaskets in the nuts. Then, open the gas and turn on the burners in order to check the strength of the connection and eliminate possible gas leaks. For ease of checking, use a gas analyzer.
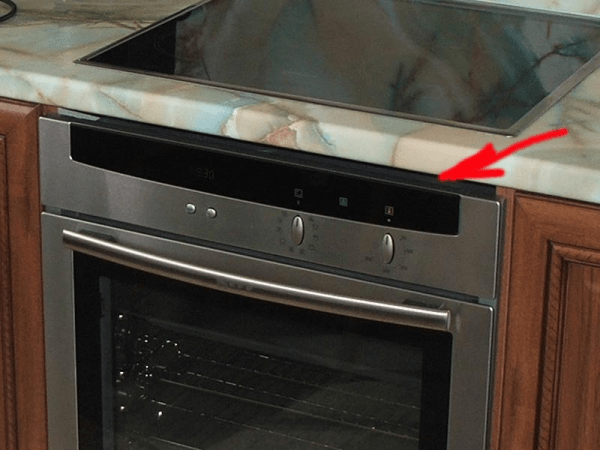
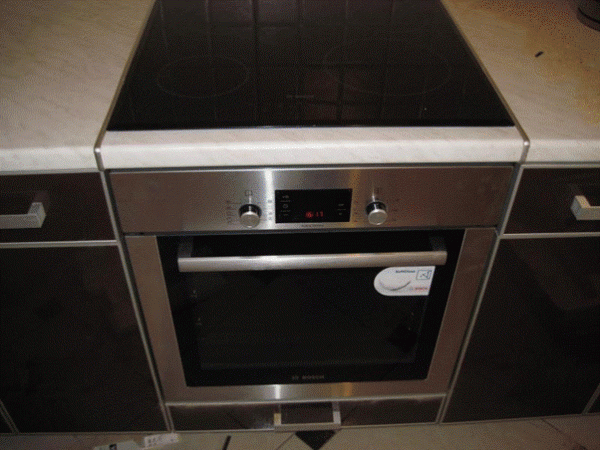
Rules for installing a hob above an oven
An induction hob has many positive characteristics. Among them:
As you can see, this option has a lot of advantages. Therefore, it is not at all surprising that you also wanted to install this kind of stove at home. How to do it right? Installing a hob above an oven has a certain sequence and rules. In order to understand this issue in more detail, it is worth considering all the features of installing the panel.
- If you are embarking on a process such as installing an induction hob over an oven, you should know that it must be equipped with forced ventilation and cooling system;
- Remember that the fastening must be done perfectly flat surface. Otherwise, deformations may occur that will disrupt correct work hob.
Installation procedure
- Take short, blunt screws and screw 4 springs into the holes that are located on the sides of the device;
- We insert the hob into the kitchen module, level it and lightly press on the center - this will ensure the most even installation;
- If it has side profiles, then after you insert it into the kitchen module you need to insert 4 fastening hooks. Make sure that the center spring screws remain accessible.
Important! When installing the hob above the oven, electrical connection and the cabinet itself must be built in separately. This must be adhered to based on the safety rules when working with electricity.
Before connecting the electrical, you need to check:
- socket condition: it must be grounded and comply with all technical standards and standards;
- the socket corresponds to the required voltage when connected;
- whether the socket matches the plug.
Remember that installing a hob into a countertop with your own hands or installing a panel above an oven requires extreme care from you. You must definitely take into account a large number of requirements that will help you install it competently, quickly and efficiently. Following the instructions described above, you will not need to involve specialists to carry out this operation.

Before the connection is made, it is worth carefully checking the voltage and frequency of the current in the outlet and compliance with all established standards for safe self-installation panels.
Panel connection method: socket or connection block
There are two options for connecting an electric hob to power:
- Through a plug-socket connection;
- Through the terminal block, directly connecting the panel wires to the power cable.
Both options have a right to exist. The advice is simple: if the panel comes with a plug, then install a socket. The contacts of a standard stove socket can withstand 32 amperes, and nothing will happen to them if you do not turn it off when the load is on (the stove is on).
The connection through the terminal block is more reliable, although it is not convenient when repairing the panel or replacing it.
How to install a hob in a countertop - stages of work
- Cut a hole in the tabletop according to the template;
- Place the hob in place;
- Make an electrical connection to the panel (the machine is turned off);
- Turn on the power and check operation.
Note: If the hob does not have a sealing gasket that will ensure a tight fit of the panel to the countertop, before installing the panel in the niche, coat the edges of the countertop with sealant.
As a result, the hob must lie firmly on the countertop and be tightly attached to it.
Panel connection
- Now connect the panel to the outlet or power wires. This work must be done strictly with the power supply turned off..
- Turn on the circuit breaker for the electric stove group and check the operation of the panel according to the instructions.
- By the way, you need to check the operation of the panel before installing it in a niche, so as not to spoil the presentation if a replacement is needed.
Cooktops save space in the kitchen, and they work just like bulky stoves. In addition, installing the hob is not difficult at all, it happens quite quickly, and any adult can handle it if he has certain tools.
For those who have started a kitchen renovation, they have the opportunity to replace the stove with a surface. You can also do a combination of surface and separate oven, and thus you will lose absolutely nothing.
Sawing a hole
If you have already done renovations in the house or were engaged in some construction work, then the process of installing the hob into the countertop should not be difficult for you. So, let's begin.
- To install a surface into a countertop with your own hands, you first need to know its dimensions. All required dimensions are indicated in the diagram in the instructions, there is no need to invent anything. This speeds up work and significantly reduces the likelihood of errors in measurements. You can take measurements yourself by turning the panel over and using a tape measure to determine its width and length along the inner edges.
- Please note that the instructions indicate the minimum distances from the edges of the tabletop. You can only change them upward, since an edge that is too narrow may break off over time.
- Make markings on the countertop according to the dimensions of the hob. It will be built into this place. To ensure that the lines do not rub off and are more visible on a dark surface, glue strips of paper tape and transfer the lines to it.
- Next, drill a hole where the cutout will begin. The cut is made using an electric jigsaw. To ensure an even cut without crumbling, it is recommended to use a file with fine teeth, not dull. It’s even better to use a hand router, round the corners with a radius cutter, and grind the cuts.
- The resulting sawdust can be collected using a vacuum cleaner.
When the hole is ready, try on the hob to make sure everything is done correctly.
Sealing and sealing
Process the cuts silicone sealant or nitro varnish. This will protect the tabletop from dirt, getting wet, swelling and premature damage. You can also use a self-adhesive sealant, which performs the same function. It is glued on top so that the edges of the panel rest on it.
You can also use aluminum tape to seal the edges, which, among other things, will protect the tabletop from temperature changes. Having a quality seal will ensure that your countertop will last a long time and will not require repair or replacement.
Electrical Panel Connection
Modern electrical panels are very convenient; if they are well assembled, they rarely fail, which means they will not need repairs for a long time. If repairs are still required, the panel can be easily disconnected and taken to the workshop on your own, thereby saving on calling a technician.


Before embedding electrical surface, you need to put it on the tabletop, turn it over and connect it according to the diagram. The diagram is shown directly on the panel with reverse side to make you feel comfortable. When doing this procedure on your own, be careful. If the wires are connected incorrectly, you will not be able to control the activation of the burners and the heating temperature.
If a separate wire from the panel is provided to connect the electric hob, then a plug and socket are not needed. Simply connect the wire to the panel.
Turn the panel over and install it in the hole. It is already ready to work, all that remains is to check whether it turns on and heats up correctly.
Gas panel connection
When installing a gas hob, first look at how it is attached. Install the panel, align it with the edge of the table and secure it. Typically, brackets are included with the panel for mounting from below. Electric wire must be plugged into a power outlet.
To connect the gas yourself, you need to know the safety rules. Turn off the gas and connect the hob to the pipe using a flexible hose. Be sure to put paronite gaskets in the nuts. Open the gas, turn on the burners and check the hose connections for leaks. To do this, they need to be soaped. If the foam does not bubble, then there is no leak, you did everything right. You can also use a gas analyzer to check.
Built-in Appliances gives the kitchen set an aesthetic appearance appearance, therefore extremely popular among buyers. Electrical and gas stoves not only save space in the kitchen, but are also highly functional. But how to install a hob into a countertop? Today we will tell you about this in detail.
Step-by-step instructions for installing a built-in slab
Installation of a built-in gas or electric stove is carried out in accordance with the instructions. It is not particularly difficult, but it requires knowledge of several points, which allows the whole process to be carried out not only efficiently, but also quickly.
Before inserting the slab, it is important to determine its exact dimensions, which are indicated in the diagram in the instructions. The length and width of the device are measured with a tape measure along the outer edges; to reduce the likelihood of error, it is recommended to measure again.
Note! The diagram in the instructions for the equipment indicates minimum values indentations that need to be left from the edges of the tabletop. It is not recommended to reduce them; it is only possible to change them upward, since a very narrow edge of the table can break over time.
In accordance with the dimensions of the purchased gas or electric panel, you need to make markings on the countertop. It is important to draw all the lines extremely carefully, since any inaccuracies and distortions will be impossible to correct in the future. When marking on surfaces dark shades or with a smooth texture, you can use paper tape to limit them and provide better visibility.

After marking, you will need to embed the hob into the countertop:
- Initially, a hole is drilled in the place where the cut will be made;
- Cutting can be done using a jigsaw, and to reduce the roughness of the resulting cuts, it is recommended to use a file with fine teeth. An alternative option is a manual router (the corners of the cutout are rounded using a radius cutter, and the resulting edges are additionally ground). If you don’t have a jigsaw or router, you can cut out the mounting hole using a conventional drill; this will require drilling a large number of holes from the inside of the marking;
- Sawdust is removed from work surfaces using a construction or household vacuum cleaner.
Note! To ensure that the cut piece of the tabletop does not damage the furniture set, you should place a stool or sheets of particle boards underneath it.
How to secure the hob to the countertop?
It is important not only to install it correctly, but also to install it correctly. After cutting the hole kitchen set you need to secure the hob to the countertop. It is first necessary to “try on” the equipment in order to make sure that the dimensions of the mounting hole correspond to the dimensions of the equipment.
After grinding, all sections are sealed with silicone sealant, which will prevent the material from getting wet and swollen, and dirt and food debris from getting inside. Along with silicone sealant, a self-adhesive seal can be used, which is fixed on the edge of the cut, and an aluminum tape that protects it from temperature changes.


- Turkey stewed in a slow cooker: spicy, with vegetables, in sour cream, cream and walnuts
- Types of speech: description, narration and reasoning
- Martyrs Tatiana. Moscow Church of St. Martyrs Tatiana Temple of the Martyr Tatiana at Moscow State University schedule
- Milotici: return of the Russian village Moravov Alexander Viktorovich
- Why you shouldn't cry in front of the mirror
- Recommendations: what to grease the pies to make them rosy and appetizing
- Actors Spiderman Aunt May Aunt May in Spiderman
- Making sounds for children Lessons on making sounds for children
- Criteria for preparing an act on the write-off of motor vehicles
- Pink salmon in the oven - delicious and easy recipes for baked fish Pink salmon fillet baked with vegetables
- What does a lizard tattoo mean?
- Deciphering the natal chart of the house
- What does mulberry help with?
- Photo report “Birthday of Samuil Yakovlevich Marshak in the group”
- Breathing at high pressure Breathing correctly at high pressure
- Bryansk State University named after
- Tasks to test spelling and punctuation literacy
- Macroeconomic calendar
- Interesting signs about spiders
- Why do you dream of wedding shoes? Why do you dream of wedding shoes with heels?