Distance between profiles on the ceiling for plastic. Ceiling Panel Installation: Durable Finish
PVC is a polyvinyl chloride material, that is, simply put, plastic is one of the most popular and diverse building materials at modern construction. Such material can be made of any shape, any design, with predetermined properties. PVC panels are lightweight, durable, strong, temperature-resistant products for quick finishing of premises. This is a great alternative to wood. How to work with PVC panels? Let's try to figure it out.
What's good about a ceiling made of PVC panels?
It is very important to distinguish PVC panels for ceilings from panels for walls, because wall panels are much heavier in weight than ceiling panels. Order for is the most common among apartment finishing teams. What are the distinctive advantages of finishing PVC ceiling-panels from any other finishes?
Here are the most typical reasons for this choice:
- cheap: PVC material is one of the simplest and most affordable; moreover, by mounting them on the ceiling, you can avoid using a large amount of plaster, plaster and other expensive materials. And simply this option is a great opportunity to save on labor costs;
- easily: You can even install PVC panels yourself - it’s not difficult from a technological point of view. Therefore, this choice reduces the cost of effort and materials, and most importantly, time;
- ease of use: such a ceiling can be removed at any time to wash or wipe. That is, they are almost ideal in care. They can be partially disassembled and reassembled, hiding anything under them: wiring, ventilation, insulation;
- resistance to moisture or damage. A ceiling made of panels can simply be wiped, dried, and the damaged panel can be replaced with a new one. If it happens that the neighbors from above flood, you won’t have to redo everything from scratch;
- aesthetically pleasing: The PVC ceiling is ideal in appearance, it hides all the irregularities and flaws, which cannot be said about whitewashing and painting.
- hot shaft using thermal film;
- paints with varnish to give a glossy effect;
- applying a wood or marble pattern using topographic printing;
- production of mirror or light-transmitting ceilings using polycarbonate and polystyrene.
- To correctly and efficiently install PVC panels on the ceiling, you will need the following materials and tools:
- a hacksaw and jigsaw for shortening panels and forming slots for lamps;
- for wood - a drill, for a concrete ceiling - a hammer drill;
- standard set of screwdrivers, screwdrivers;
- mallet or hammer to fit the molds;
- level for determining a clear horizontal ceiling - meter size and half meter;
- masking tape, tape measure, pencil;
- construction stapler;
- screws, nails, assembly adhesive;


They differ from lining and sheets in size: they range from 15 to 50 cm in width, and the standard length is 3 m. They also differ in the method of applying a design to them:

To choose good PVC panels in the store, you need to take into account their appearance, smell, shape, correct geometry, clarity of coating and color, and resistance to bending.

A good panel will not leave marks on itself after 3-4 bends, will not smell strongly of plastic and will have a sufficient number of stiffening ribs, which can be seen on the cut of the panel. It is also worth carefully inspecting the product for nicks and irregularities: good material should definitely not have them. Advice.
are used not only as finishing joints, but also bring their own flavor to the interior.
What tools will you need?
stepladder or scaffolding (stool).
How to start installing a PVC ceiling
- In order for the ceiling to have something to stand on, you first need to fix a rigid profile on the wall, at a level of 10-20 cm from the ceiling. So, step by step:
- Using a level, measure the horizontal mounting of rigid profiles on the wall around the perimeter of the room.
- Attach the profile to the walls using self-tapping screws and pre-drilled holes with a hammer drill.
- We insert the PVC product into the frame, measuring along the length, cutting profile strips to fit the size of the ceiling. After mounting the first strip, insert another, carefully fitting it to the first so that it fits neatly into the grooves. All profile panels are screwed with self-tapping screws onto a frame running on the ceiling - usually it is made of aluminum or wooden beams. The number of screws and attachments of the panel to the beams depends on the size of the room: the wider the ceiling, the more places for fastening.
- The most important step in installing the ceiling is the last panel. Usually the width of the strip is not clearly included in the size, so we cut the panel to the desired width lengthwise. We paste adhesive tape on it and, by pulling this tape, you need to pull the panel under the grooves of the penultimate plank.


It is necessary to place the frame or ceiling plinth on liquid nails, and remove any remaining glue with a rag.
Installation nuances
- be sure to use a level to measure a perfectly straight horizontal line;
- In order for the L-shaped frame around the perimeter of the ceiling to hold better, you need to place it on a a large number of Rotband mixtures, and remove the excess amount and wait for the mixture to dry;
- installation of plastic strips must begin from the wall, not forgetting about internal communications - wires for lamps, holes for air conditioning, etc.
Useful. How to correctly cut and connect the corners of the ceiling plinth - in our review.
What installation mistakes should you watch out for?
It is better to use an aluminum frame instead of beams and beams - then these lintels will not change their shape due to moisture - the aluminum will not bend or rust due to steam, and wood can ultimately damage the structure.

Cutting a hole for the lamp
It is also worth noting that hastily installers can fasten panels with staples from a staple gun, but this is not reliable way fastenings, it’s better to do it with self-tapping screws.
It is especially worth thinking about the reliability of fastening if you choose a finishing material.
Plastic ceiling panels are a good alternative plasterboard structures. Easy to install, durable to use, they perfectly mask defects ceiling surface and give the room an attractive look. Installation will not be difficult if you carefully study the technology.
Tools and materials for work
In order not to be distracted by searches while working, everything necessary tools and materials should be prepared in advance:

It is better to use a water level, so the marking will be done faster and with greater accuracy. The slatted frame can only be mounted in a dry room; it is better to mount it in the bathroom or kitchen aluminum profile. If the length of the ceiling is longer than the length of the panels, an additional H-shaped connector molding will be required. Its design allows you to securely fasten two adjacent panels and avoid sagging at the joints.
Calculation of the quantity of materials

When planning, it is very important to correctly calculate the quantity necessary materials. This will help avoid unnecessary costs and reduce waste after renovation. First you need to calculate the area of the ceiling by multiplying its length by its width. In the same way, determine the area of one panel, and then divide the ceiling area by the panel area and round the resulting value up.
Since panels will be cut during installation and there may not be enough material, it is recommended to increase the ceiling area by at least 10% when making calculations. If the ceiling surface has a complex configuration, it is better to add 15% for trimming. In addition to the panels, you will also need slats for the frame; to find out the total length of the slats, you need to divide the width of the ceiling by 0.3 and multiply by its length.

When attaching slats to the ceiling, dowels and screws are placed at a distance of 40 cm from each other. The starting profile is attached every 0.5 m. Knowing the length of all the slats and the profile, it will not be difficult to calculate the number of fasteners. total length The UD of the profile is equal to the perimeter of the ceiling plus 10% for joints. Should be the same length ceiling plinth. The consumption of the primer mixture is usually indicated by the manufacturer on the packaging, so when purchasing you need to know the area of the ceiling.
An important point: when buying plastic panels, you should immediately check their integrity in the packaging and the absence of defective elements. It often happens that after printing a purchase at home, people find defective, bent or broken panels, free replacement which are very difficult to achieve.
Installation technology for plastic ceilings

The connection of the panels is quite tight, but not airtight, and therefore the smallest particles of dust, lime and plaster from the ceiling surface can penetrate through the seams. In addition, mold often appears on the ceiling, especially in the corners, and fungal spores also enter the room and are inhaled by people. To avoid such troubles, you need to prepare everything correctly.
There is no need to level the ceiling, but it is necessary to remove peeling whitewash or plaster. It is best to go over the ceiling with a brush with stiff bristles, and then wipe off dust with a damp cloth. Cracks and through holes or cement mortar. Finally, the ceiling is primed twice with a deep penetration antifungal compound.
Prices for mixtures for leveling walls and ceilings
Mixtures for leveling walls and ceilings
Marking for the starting profile

In order for the ceiling to be level, the panels must be located in the same horizontal plane. To do this, precise markings are made along the perimeter of the walls for the starting profile. Depending on curvature work surface and the thickness of the wiring from the ceiling recedes downwards by 5-10 cm. Mark a point on the wall with a pencil and start marking the level from it. Marks are placed in each corner and in the middle of the walls, and then connected using bevels.
UD profile mounting


TO concrete walls the starting profile is secured with dowel nails or anchor bolts, having previously drilled holes along the marking line. TO wooden surface The frame is screwed with long self-tapping screws. The fastening step is 50 cm. The profile is applied to the markings, leveled horizontally and screwed. At the joints, as well as along the entire length, there should be no gaps between the wall and the profile.
Frame installation

The sheathing slats are arranged in parallel rows every 30-40 cm. First, straight lines are drawn, 30 cm away from one of the walls. Metal hangers are screwed to the ceiling along these lines in increments of 35-40 cm. A sheathing made of profiles or slats is mounted on the hangers, the ends of which are inserted into the starting profile around the perimeter, then the structure is checked by the building level. All elements must be strictly in the same plane; any unevenness and deviations from the horizontal will lead to deformation of the ceiling.

Laying electrical wiring
When the frame is securely fixed, installation begins. Carefully consider the location of cables, luminaire outlet points, ventilation ducts. Each system should be isolated from the rest as much as possible, and cables, hoses and wires should be neatly secured into bundles with plastic clamps. It is desirable that the wires are corrugated and firmly attached to the ceiling; sagging of wiring elements is unacceptable. Where the lighting device will be installed, the sheathing must be additionally reinforced with guides. At the end, they once again check the horizontality and strength of fastening of the sheathing, and the absence of parts protruding beyond the boundaries of the frame.
Prepare the L-shaped strip and the first panel: measure the distance between the walls and cut the plastic with a hacksaw. The ends of the outer planks are cut at an angle of 45 degrees. It should be taken into account that the panels are attached perpendicular to the guide profile. The L-shaped strip is installed first; it is secured with self-tapping screws to the slats located along the perimeter of the ceiling. Stand on the side where the trim will end; you don’t need to screw the strip on yet. Next, the first panel is inserted on one side into the profile, holding it in a horizontal position along its entire length.


If the ceilings have a large area, it is better to work with an assistant, since holding the panel suspended and at the same time attaching it to the sheathing is quite inconvenient. The free side edge of the panel is fixed with self-tapping screws to the supporting profile or slats. Thin plastic can be attached to wooden guides using a construction stapler. Each subsequent panel is mounted in the same way, carefully inserting the ends into the L-shaped strips.

When using panels of short length, it is recommended to stagger the transverse seams. This will make the ceiling look more attractive. Each element is trimmed sequentially as soon as the previous one is secured. This helps reduce material consumption and more precise fit of joints.

When installing panels in places where electrical wiring exits, holes of the required diameter are pre-cut in the plastic. This can be done using a sharp stationery knife. The last strip is first adjusted to the width of the hole, then inserted into the L-shaped profile, and its edge is coated with glue and inserted into the ceiling. If you plan to use a ceiling plinth instead of a profile, the edge of the panel can be fixed with self-tapping screws - they will not be visible under the baguette.

When gluing the baguettes, you should very carefully apply them to the ceiling so as not to stain the plastic. If this happens, you must immediately wipe the glue with a clean cloth, because it is quite difficult to clean it after drying. At this point, the installation of the plastic ceiling is considered complete.


Prices for popular finishing wall panels
Wall panels
Video - DIY plastic ceiling
Currently, many materials are used to decorate the ceiling. various materials and methods. One of them is finishing the ceiling using PVC panels. This material has a number of advantages, which will be discussed below, it is quite practical, and anyone can install PVC panels on the ceiling with their own hands. The lightness of the material and ease of installation make PVC panels quite popular for finishing works bathrooms and kitchens.
Of course, PVC panels have some advantages, which explain the popularity of this material.
- Affordable price;
- Lightness of plastic;
- Waterproof;
- Unlimited shades;
- The ability to carry out repairs and installation yourself;
- Easy to care for;
- Resistance to temperature changes;
- Noise insulation;
- The ability to smooth out uneven ceilings;
- There are no sagging joints, creating an even, seamless coating.
Due to their complete waterproofness, PVC panels are most often installed in bathrooms. It is also very easy to care for, just wipe it with a cloth, you can use any detergents, the main thing is that they are without any abrasive particles that can damage the plastic panels.

Due to all of the above advantages, professionals recommend the use of wall plastic panels for self-installation.
Plastic panels come in 3 types: white, flowers, textured. The first ones are the cheapest, do not have any pattern or color, and are most often used for finishing bathrooms. Colored and textured ones are more expensive than white ones, they can be installed in the kitchen, bathroom, even in the bedroom and living room.
How to install PVC panels on the ceiling yourself
First you need to calculate the amount of finishing material. To do this, you need to make a drawing, it is possible that you will need to cut the panels somewhere, and not attach them completely. It is necessary to calculate the width of the panels, select the length, and choose the direction of fastening the panels to the ceiling.
At least one day before installing the panels, you must remove them from the packaging and allow them to acclimatize.
The installation methods for PVC panels are as follows:
- If the ceiling is perfectly flat, then PVC panels can be attached using special glue directly to the ceiling;
- Otherwise, it is necessary to create a frame that will hide the flaws and unevenness of the ceiling. Preparing the frame is not a difficult task; you need profiles (they can be made of wood, metal, plastic, or in the form of sandwich panels.)
When purchasing, you should pay attention to the surface of the panels. It should be smooth, without cracks or scratches, and there should be no gaps when joining two panels together. The plastic must be the same color, without deformation.
Installation of PVC panels on the ceiling (video)
Selection of material, production and installation of the frame
There are several materials from which frames are made.
- Wood;
- Metal;
- Plastic.
The easiest to install is a wood frame. It includes slats and wooden beams. However, such a frame is not suitable for rooms with high humidity.
A metal frame is more durable; it is more often used in large rooms where a significant number of lighting fixtures are required.

Using a level, the lowest point of the base is determined, and then markings are made along it along all the walls. Having retreated 5-6 cm, another level is marked, it will be the basis for the ceiling. Directly on the ceiling, points are marked for attaching beams or profiles in steps of half a meter. The marking lines run depending on the direction of fastening the panels; beams and profiles must be perpendicular. It is necessary that the joints of the panels fall in the middle of the beam.
The beams are installed using self-tapping screws; the wood frame must be treated with water-repellent emulsions to prevent rotting of the material.
Installed first load-bearing walls along the marking lines. Then they are installed ceiling profiles. After installing the frame, it is necessary to conduct wiring for the lamps. It is worth remembering that the lighting arrangement requires lowering the ceiling by no less than 10 cm.

The procedure for installing a ceiling made of PVC panels
You can highlight the main points of ceiling finishing using PVC panels.
The order is:
- Calculate the number of panels, choose the color of the panels, buy the material and let it acclimatize;
- Create markings, manufacture and install a frame (if necessary);
- Install electrical wiring if necessary;
- Attach PVC panels using special glue, staples or screws. If they are attached to the frame, then they can also be mounted using glue, staples, and self-tapping screws. Next, the corners are attached.
After securing the frame, you need to make sure that it is perpendicular to the panels. To do this, you need to install the profile as close as possible to the wall and fix it.

The panels should not be inserted all the way and the screws should not be tightly tightened, otherwise they may become deformed due to temperature changes in the kitchen or bathroom.
Installation of the last PVC panel on the ceiling
When installing panels on the ceiling, some difficulties may arise with attaching the last panel. On one side, you can turn the strip over and cut it to length to required size, then press it tightly to the previous panel and secure it. If dismountable plinths are used, then it will be much easier and more reliable to simply cut the plinth to the width and fasten it to the previous strip.
If the tile does not fit in size, it can be easily cut stationery knife and bring to the required size.
It is worth remembering that PVC panels and skirting boards are very fragile, even the slightest bend or pressure can damage the material. They must be handled with care and precision.
In conclusion, we can say that PVC panels are affordable and easy to use finishing material, which is ideal for kitchens and bathrooms due to its moisture resistance properties. Caring for the panels is also easy; simply wipe them with any cleaning agent. Anyone can install PVC panels; the main thing is to handle this fragile material carefully.
Can be used to finish the ceiling different materials, but PVC panels are the most practical, accessible and easy to install.
Any home craftsman can make a ceiling from PVC panels with his own hands; to do this, you need to purchase or rent the necessary tools, study the installation sequence and recommendations of specialists.
In order to independently, you first need to correctly calculate their number and required length, understand how installation is performed load-bearing structure and the panels themselves, after which you can begin work.
Before you start calculating the amount of required materials, you need to decide which PVC panels you will use, since they have different sizes. pay attention to the fact that the panels are ceiling-mounted and not . Since they are not subjected to serious loads on the ceiling, their strength will be less, and the cost will be correspondingly lower.
Standard sizes of ceiling panels will be as follows:
- thickness within 3-5 mm;
- width from 125 to 350 mm;
- length is usually from 2.7 m to 6 and even 10 m.

Ceiling in the bathroom
A parameter such as the width of the material is of great importance. If you veneer, there will be fewer seams, so the surface will look more seamless. Narrow panels have their advantages: they are much easier to work with, but they result in a large number of seams. Experts recommend using medium-width material for finishing the ceiling, so it should be 250 mm.
When you decide on the length and width of the panels, be sure to pay attention to the quality of their manufacture. When choosing a material, pay attention to the following characteristics:
- the geometry of the products must be observed, and their surface must be even and smooth;
- if there is a pattern, it must be applied clearly and evenly;
- The stiffening ribs should not be visible on the front side;
- compare several types of panels, the more stiffeners they have, the stronger the structure;
- pay attention to such characteristics as the thickness of the stiffeners and external walls;
- try to connect two parts, the joining should be easy, and the gap should be minimal, almost imperceptible;
- check the material for bending, it should not crack or change its shape.
Calculation of the number of panels for the ceiling
To calculate the number of PVC panels, you first need to determine the area of the room in which the ceiling will be finished. To determine the area of the ceiling, multiply its length by its width. The packaging of PVC panels must indicate the area of one element. All you have to do is divide the resulting ceiling area by the area of one element, and you will get the number of required panels.
When determining the number of panels, you usually get a fractional number, round it up, add 15-20%, which will be spent on cuts, and you get the number of panels you need to purchase.

You need to focus on the length and width of the room, decide how the panels will be installed, lengthwise or crosswise, and, in accordance with this, select the required length of the elements.
Ceiling with LED lights
In addition to the required number of PVC panels, the number of metal profiles used for lathing is calculated. To do this, make a diagram of the room on paper and draw parallel lines along the wall at a distance of 0.6 mm from each other. Calculate and obtain the required length of the profiles.
The standard length of a galvanized profile is 3 m, so the resulting length is divided by 3 and the number of profiles is obtained. If the area of the room is more than 6 m2, then transverse strips are also installed, the number of which is calculated separately, in accordance with their installation diagram.
Ceiling finishing option
A more rigid profile is installed on the walls along the perimeter; to determine its quantity, it is necessary to calculate the perimeter of the ceiling. Calculations are being carried out for dowels for attaching profiles to the ceiling and self-tapping screws with which PVC panels are attached to the sheathing. For every 50 cm of profile or panel you will need one dowel or self-tapping screw. To determine the length of the ceiling plinth, you need to divide the resulting perimeter of the room by 3 (the length of the plinth), round up to a larger integer, and you will get required amount
elements. Instead of a galvanized profile and self-tapping screws, when creating sheathing in a room with normal humidity, you can use wooden elements
Installation of ceilings made of PVC panels
Regardless of the material used to create the frame, the markings are done the same way. Typically, the distance between the profiles is 60 cm; marks are made on the ceiling across the direction of laying the panels on opposite sides, and markings are applied using a tapping cord.

Ceiling installation
If the frame is not attached to the ceiling surface, but on suspensions, then the line marked on the walls around the perimeter of the room is lowered to the required distance. In addition, marks are made on the marked lines for the profiles every 50-70 cm for attaching hangers.
Load-bearing structure
If the PVC ceiling is lowered, then first hangers are fixed at the marked points, this is done using dowels. At the next stage, it is attached to the wall around the perimeter of the room. metallic profile. First, it is installed on the marked line, then holes are made in the wall at a distance of 30-40 cm, they are made through the profile and immediately fixed with dowels.
Now the ends of the profile cut to length are inserted into the wall profile, and it is fixed with self-tapping screws to the hangers; for the reliability of the structure, this must be done on both sides of each hanger. After this, the ends of each element are fixed with self-tapping screws.

Headlining
After installing the frame, it is carried out electrical wiring, for this, corrugated pipes are attached to hangers, and the cable is already laid in them.
If the room area is more than 6 square meters, then between the longitudinal load-bearing profiles it is necessary to install transverse jumpers, which are needed to enhance the rigidity of the structure.
Ceiling cladding with PVC panels
Regardless of what material was used to create the frame, the installation of PVC panels is carried out according to the same scheme. Please note that working with wood is easier, but metal elements are lighter and more durable.
Installation of PVC panels is carried out in the following order:
- a starting strip is mounted around the perimeter of the room on the installed profile;
- if you plan to install a ceiling plinth, then a special rail is installed for it;
- after this, the ceiling plinth is installed;
- into the gap on the baseboard or starting bar, which is U-shaped, the first panel is inserted;
- the first element is aligned and fixed with screws or staples to each supporting profile;
- the next panel with its tenon should fit tightly into the groove of the previous one, the parts should be tightly connected so that the gap between them is minimal;
- after this, the panel is fixed, and all subsequent elements are mounted in this way;
- in those places where the lamps will be installed, holes are first made in the panels, and during installation the cable is routed through them;
- the last panel is inserted into the groove of the previous one. If its width is large, then you have to trim it to the required parameters;
- near the wall, the panel can be fixed through and through with self-tapping screws, since they will then be hidden under the baseboard;
- All that remains is to install the ceiling plinth, which will close the gap between the wall and;
- Spotlights are installed and connected to ready-made locations.
Advice from experts when finishing the ceiling with PVC panels:
- in order to prevent the growth of fungus and mold, the surface of the panels, as well as all wooden elements, must be treated with special means before installation;
- even if the ceiling is flat, you cannot glue plastic panels to concrete, as there will be no ventilation;
- buy only high-quality material, an attempt to save money by purchasing cheap materials leads to the fact that they quickly lose color and shape and can release harmful substances;
- Before installing the panels, be sure to do the electrical wiring and check its functionality;
- in rooms with high humidity, you cannot make a frame from wooden elements.
Summarizing
If you decide to finish the ceiling yourself, then the most the best option, having a beautiful appearance and low cost, will be the use of PVC panels. Installation of this material is easy, so you can cope with the work without outside help, just study the installation technology and follow all the recommendations of specialists.
Video on the topic
Plastic has many supporters and no less opponents. But if you need an inexpensive, quickly installed and attractive finish, then one of the most popular options is plastic panels. Every year their range is increasing. There are plain, striped, checkered, with flowers and plant elements, imitating brickwork, natural stones, etc. Of all this variety, the ceiling made of plastic panels is usually made of a single color. And most often - white or very close to it - with a slight tint, such as “baked milk”, ecru, ivory, etc.
Depending on the type of surface, they can be glossy or matte. There are collections with a rough surface - for those who prefer original solutions. Also available with shiny inserts. But since ceilings made of plastic panels are almost always made in technical rooms - kitchen, bathroom, toilet, balcony - the small size, as a rule, forces you to choose a glossy surface: it visually raises the ceiling, and due to reflection, the room seems more spacious. Also, reflections on the ceiling increase the illumination - when matte ceiling must be taken large quantity lamps or increase their power.
Harmful or not
You can often hear that plastic has no place in the house. Perhaps, but we have plastic almost everywhere. They even package goods in it; many of our products in the kitchen and bathroom are also made of plastic. PVC panels are made from the same group of plastics as syringes and food containers. What’s nice is that this material does not have pores in which bacteria and other microorganisms can settle. If there is a nutrient medium on the surface and the conditions are favorable, they will multiply, but they can be removed with one movement of a rag soaked in soapy water or a disinfectant solution. Plastic panels are truly hygienic. Proof can be considered the fact that the sanitation station allows them to be used in medical institutions.

There are plastic panels mirrored or with mirrored parts - stripes
The second point that stops many: the flammability of plastics. They really do burn. They begin to maintain the flame at a temperature of +360°C. For comparison: fiberboard also begins to burn at +250°C. If we compare these materials by the amount of smoke emitted, then plastics emit 40-50% less smoke.
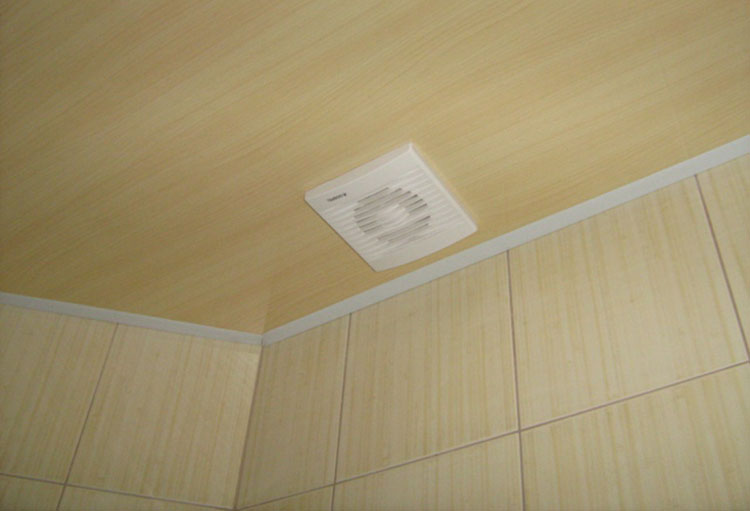
Another argument: the ceiling made of plastic panels does not breathe. If you live in a private house and have a ventilated attic above, air exchange is important. If you live in a high-rise building, you still need to install a ventilation system, which is a must in both the kitchen and the bathroom with toilet. To prevent condensation from accumulating behind the ceiling, build a couple of ventilation grilles in opposite corners. Although, the ceiling is still not airtight and with sufficient air exchange no problems arise.
Types of plastic ceiling panels
All PVC panels are divided into two categories: wall and ceiling. They are distinguished by their rigidity and weight: not important on the ceiling mechanical strength, therefore the material is made lightweight, with thin walls. You need to handle them carefully: you can crush them even with two fingers. Is it possible to install wall panels on the ceiling? It is possible, but they are more expensive, and their higher strength is not in demand. In addition, they are heavier, so the load on the frame (if there is one) will be slightly increased and this must be taken into account when installing it.
Now about the sizes of the panels and the types of their surfaces. There is a material whose appearance resembles clapboard: the same stripes, only made of plastic. A ceiling made from such panels is also called slatted because appearance the surface is very similar.

An almost flat, crack-free surface with hardly visible joints is obtained from seamless plastic panels. The joints of such panels are almost invisible: the front surface is flat and smooth, and on the sides there is a tongue and groove, like on a regular lining, with the help of which the skin is assembled.

There is also sheet plastic. It is more difficult to work with and is rarely used: it is necessary if columns or other non-linear surfaces are finished, and it is more convenient to assemble the ceiling from slats.

The advantages of ceilings made of plastic panels include ease of care: almost any dirt is washed off with warm soapy water. The appearance remains unchanged for about 5-10 years, depending on the quality of the plastic.
How to make a ceiling from plastic panels
When purchasing PVC slats, you will also need finishing profiles - moldings - with which you decorate the ends and joints. Their choice depends on the configuration of your room and how exactly you are going to make the ceiling. There are two options: make a suspended ceiling or attach the plastic directly to the main one.

Suspended ceiling made of plastic panels
On the one hand, a suspended ceiling allows you to covertly lay communications without having to drill walls. On the other hand, it “eats” some height. It will take a minimum of 3 cm. But this is the case if the lamps are installed with ordinary ones, and not built-in ones. To install a built-in lamp, the false ceiling must be lowered from the main ceiling by 8-12 cm. You will not find smaller lamps, except furniture or LED ones. If you put them in sufficient quantities and separately illuminate the mirror, then there should be enough illumination.

Assembling the frame
When installing a suspended ceiling, a frame is assembled from guides. Most often, profiles are used for working with drywall. If you are making a ceiling in a bathroom or kitchen, take galvanized profiles and fasteners. In drier rooms this is not critical. They also assemble a frame from wooden blocks of 30*30 mm or larger cross-section.
First nail the planks or profiles around the perimeter, placing them all level. Then, intermediate guides are attached to standard hangers (there are two types) or wooden blocks in increments of 50-60 cm. They are also aligned so that they are in the same plane as the previously installed ones (it’s easier to do if you stretch the threads between the already installed ones and align them).

If you decide to make a minimum indentation, just to lay the corrugated hose - 3 mm, then the planks are nailed directly to the ceiling. If necessary, the level is leveled using pads - pieces of plywood, wood wedges, etc. In this case, the frame looks something like this.

Installation of starting strips
After the frame is assembled, you can begin installing the plastic panels. It starts with setting up a starting profile. In the case of a ceiling, ceiling molding is also used.

It is attached close to a profile or strip fixed around the perimeter of the room. The edges are filed at an angle of exactly 45°. The length must be measured very accurately: the slightest discrepancy leads to the appearance of gaps. Against the background of a white ceiling and white profiles (or colored, it doesn’t matter), the cracks turn black very clearly. If they are small, it will be possible to cover them with putty, but it is better to cut them off clearly: exactly along the length of the wall or with a slight spacer of 1 mm.
The cut strip can be glued or screwed with self-tapping screws. It is better to glue ceiling molding (with liquid nails). This way the joint turns out perfect: when gluing you press the bar tightly, when screwing it onto the “bugs” you cannot achieve this effect, since it is twisted forward a little.
On the side that goes to the wall, apply a thin strip of glue in a zigzag. The surface of the wall is degreased (you can use 646 solvent). After drying, the piece is set in place, pressed tightly along its entire length and torn off. There should be glue left on the wall. Leave it to dry for a few minutes (4-8 depending on the viscosity, the bar should not float, and the glue should stick well) and then put it in place. To be sure that the plank is level, take a rule, a ruler, an even block and check the level of the glued starting profile. If necessary, until the glue has completely set, the bar is adjusted.

Having glued the starting profiles on three sides (letter P), they are left to dry, otherwise, when installing the planks, they can be moved from place. After 8-12 hours the glue will harden and installation can continue.
If during gluing “liquid nails” are squeezed out somewhere, do not clean it. Wait until it is completely dry, then pry it off with a sharp knife. The glue will simply break off and there will be no traces left. If you try to remove it liquid, it will only smear and stain everything around.
Installation of plastic panels on the ceiling
After the glue has dried, you can begin installing the plastic panels themselves. Measure the size from one joint of the already installed skirting boards to the other, add 1.5-1.8 cm to this value. Cut the panels to this length. There is no need to make them across the entire width or length of the room - they will not appear in profile. If the geometry of the room is ideal, you can cut a lot at once. If there are deviations in size, make several pieces at a time, adjusting the length as you go. You can cut plastic with a jigsaw or grinder.
The first panel fits into the previously installed molding on three sides. It is placed with the spike forward - in the bar. Sometimes, if the trim profile is made of soft plastic, the top part (mounting flange) will sag, making installation difficult. To reduce the deflection, this edge can be secured with self-tapping screws. This will make it easier to insert the plank, otherwise you will have to correct it with a spatula, putting the panel in place. It should fit into the plinth or starting profile exactly along its entire length. The inserted strip is secured to each guide with a self-tapping screw. For attachment to wooden frame you can use a stapler with staples (if you are installing it in a bathroom or kitchen, then take the staples from stainless steel or galvanized).

The installation of subsequent stripes is the same. They are installed first with one edge - into the molding (it goes into the baseboard by 6-7 mm), then insert the other edge. After that, the bar is leveled by lifting the middle with your hand and eliminating the deflection, tapping the edge with your palm, driving the lock into the groove. It doesn't take much effort, just to make sure it fits tightly. From below you will see that there is no gap at the junction, which means the strip is normal.
If there is an assistant, he supports installed panel so that it does not fall out while you are securing it with screws (staples). If you work alone, you can eliminate the sagging by gluing small pieces of double-sided tape to the profile. They will hold the bar until you secure it. This is how you assemble all the panels.
During the installation process, do not forget to cut holes for installing lamps. You can do this with a ballerina or a ring attachment, you can try with a jigsaw, but if you are good with the tool and can make a round hole. As it turned out, you can make a hole with a regular drill with a thin drill bit... how? Watch the video. There are a couple more good tips there.
Having installed the strip or strips in which there is a hole for the lamp, you immediately mount it, connect it and check it. If this is not done right away, problems may arise later: how can you connect the wires if the entire ceiling is already assembled? Just disassemble part of it. What if you put the last strip on glue? We'll have to break it. That’s why we install and check its functionality right away.
Installing the last panel
The most difficulties arise when installing the last strip. It usually has to be trimmed. Measure the actual distance on one side of the ceiling and on the other. The difference can be several centimeters. There is nothing unusual or complicated about this. But then there are two options:
- Simply insert the trimmed strip into a pre-glued starter profile or plastic plinth. If the panel width is sufficient, this is possible. But then you need to subtract about 5-7 mm from the measured distance and cut off the strip. Otherwise you won't insert it. And so you have to carefully adjust it with something thin (a steel spatula) so that it falls into place. After several attempts, it still works out... But besides the installation difficulties, there is one more drawback: after a while, since the strip is a little shorter, it moves away (sinks more into the molding) and a small gap appears in the ceiling.
- The second option is to glue the strip. Then, cutting off the last panel, set aside the previously measured distance on the ceiling as it is. And not from the beginning of the panel itself, but from the thrust bar. Then it is glued in its pure form onto “liquid nails”. Only the glue is applied not to the strip, but to all the guides. Both the one along the wall and the one perpendicular to the installation (to which they were attached with self-tapping screws). Further, the technology is the same: they applied it, pressed it down, set it aside for a few minutes, and then finally installed it. The disadvantage of this method is that this strip is not removable. It will need to be broken if necessary. Therefore, leave one more in reserve - just in case.
The installation of a plastic ceiling made of PVC panels is almost complete. It remains to install the last plastic plinth. It is first trimmed mounting plate: leave only the baseboard. Afterwards, you also cut it at the corners at 45°, try it on, and cut it exactly. After trying it on again “dry” and making sure that the size is correct, apply glue to the plinth, only on both shelves: the one that will be glued to the ceiling, and the one that will stick to the wall.

Sealing cracks with acrylic
Actually, the installation is finished. But sometimes another operation is necessary: covering all the gaps with white acrylic. This operation is not necessary if you bought quality panels, which have ideal geometry - French and Belgian. After their assembly there is no need for correction: there are no saggings that form due to the fact that the panels are uneven. Otherwise, we take acrylic sealant, insert the tube into the mounting gun, and fill all the cracks and gaps. Usually these are joints and corners, as well as the junction of the plastic baseboard with the ceiling. Often there are so many cracks that you have to go through the entire perimeter.
Filling in the cracks in small areas 30-40 cm each, removing all excess and leveling the seam. Acrylic is well leveled until it sets, and this is a matter of seconds. Therefore, they smeared the piece and corrected it. If everything is fine, continue to apply. You can remove excess acrylic with a soft cloth, but sometimes it’s more convenient to use your finger - for some reason it turns out smoother. Having covered the piece, take an object with a sharp and even edge (a small spatula) and a damp sponge. Excess putty is cut off evenly with a sharp corner of a spatula, then rubbed with a damp sponge until it is clean, otherwise you won’t be able to wipe it off later. So go through the entire perimeter and leave to dry for 8-12 hours.

After the acrylic dries, it can be drawn into the seam. You have to take the tube again and fill the cracks that appear, rub it in, remove the excess and wash off the smudges. This second time is usually the finishing time. After this layer has dried, plastic ceiling divorces remain. Wipe them with a damp, clean sponge and then gently rub with a soft cloth until shiny. Now the ceiling made of plastic panels is ready, and after installing the lamps, the repair can be considered complete.
How to attach to the ceiling
If the ceiling is already level and does not need level correction, plastic panels can be attached directly to it. The procedure is the same: first the starting profile, then strips cut to size are inserted into it, securing at least every 50 cm.
You choose fasteners depending on the material from which the ceiling is made. You can hit wood with nails or staples from a stapler. It’s more difficult with concrete: self-tapping screws won’t work, and you’ll have a hard time drilling a hole for a dowel for each fastening. Then it’s better to assemble the frame with a minimum distance from the ceiling and then assemble everything as described above.

Another option is to glue it on liquid nails. The technology is well-known, but its disadvantage is that such a ceiling made of plastic panels turns out to be non-removable and will have to be completely dismantled if something happens.
Ceiling lamps made of plastic panels
We are not talking about design or quantity - here everyone decides for themselves, but about the type of lamps and power supply. There are two options: install conventional lamps at 220 V or with a step-down transformer at 12 V. In the first option, ordinary incandescent or housekeeper lamps are installed, in the second - halogen or LED. In any case, a separate circuit breaker with an RCD should be allocated for lighting the bathroom or kitchen, which will turn off the electricity supply in the event of a short circuit.
Features of installation and selection of 220 V lamps
If you install 220 V lamps, and install even low-power (40-60 W) incandescent lamps in them, you will have to somehow take care of the thermal insulation of the housing. As the lamp heats up, its body also gets very hot. The heated body causes the plastic to darken and warp over time. Therefore, glue a layer of some flexible heat-insulating material onto the body.

The second point concerns electrical safety when working with 220 V lighting. In the bathroom it is necessary to install lamps with high degree protection: not lower than IP44. This means that the lamp body is protected from water jets. Such lamps cost a lot: the technology is complex. Second point: most of them are quite bulky, since the body is usually ceramic. Simply hanging it on plastic will not work: you will need mortgages. They are installed when assembling the frame: these are additional jumpers in the places where the lamps will be attached.
Halogen and LED
Since lamps of this type require only 12 V, the electrical safety requirements are lower. In principle, any design is suitable. Power from the panel after the machine is supplied to the transformer, and from it to the lamps. Up to 4 lamps can be powered from one transformer, but there is a limitation in the instructions for them: maximum length The wire to the lamp should not exceed 2 meters. The lamps also work normally at a distance of 2.5-2.7 meters. At greater fall The voltage is already significant and the glow is weaker.

If you decide to place the transformer outside the bathroom to improve safety, this is a serious limitation, especially if the bathroom is quite large. Then you will have to carry it into the bathroom and hide it behind suspended ceiling made of plastic panels (device thickness is about 3-4 cm).
Sometimes each lamp has its own transformer. This is normal, it just costs more, but long distance between the lamps is justified.


- Turkey stewed in a slow cooker: spicy, with vegetables, in sour cream, cream and walnuts
- Types of speech: description, narration and reasoning
- Martyrs Tatiana. Moscow Church of St. Martyrs Tatiana Temple of the Martyr Tatiana at Moscow State University schedule
- Milotici: return of the Russian village Moravov Alexander Viktorovich
- Why you shouldn't cry in front of the mirror
- Recommendations: what to grease the pies to make them rosy and appetizing
- Actors Spiderman Aunt May Aunt May in Spiderman
- Making sounds for children Lessons on making sounds for children
- Criteria for preparing an act on write-off of motor vehicles
- Pink salmon in the oven - delicious and easy recipes for baked fish Pink salmon fillet baked with vegetables
- What does a lizard tattoo mean?
- Deciphering the natal chart of the house
- What does mulberry help with?
- Photo report “Birthday of Samuil Yakovlevich Marshak in the group”
- Breathing at high pressure Breathing correctly at high pressure
- Bryansk State University named after
- Tasks to test spelling and punctuation literacy
- Macroeconomic calendar
- The Forex Economic Calendar is a reference book for every trader, regardless of trading experience and level of professionalism, and especially...
- Representatives of the arachnid class are creatures that have lived next to humans for many centuries. But this time it turned out...